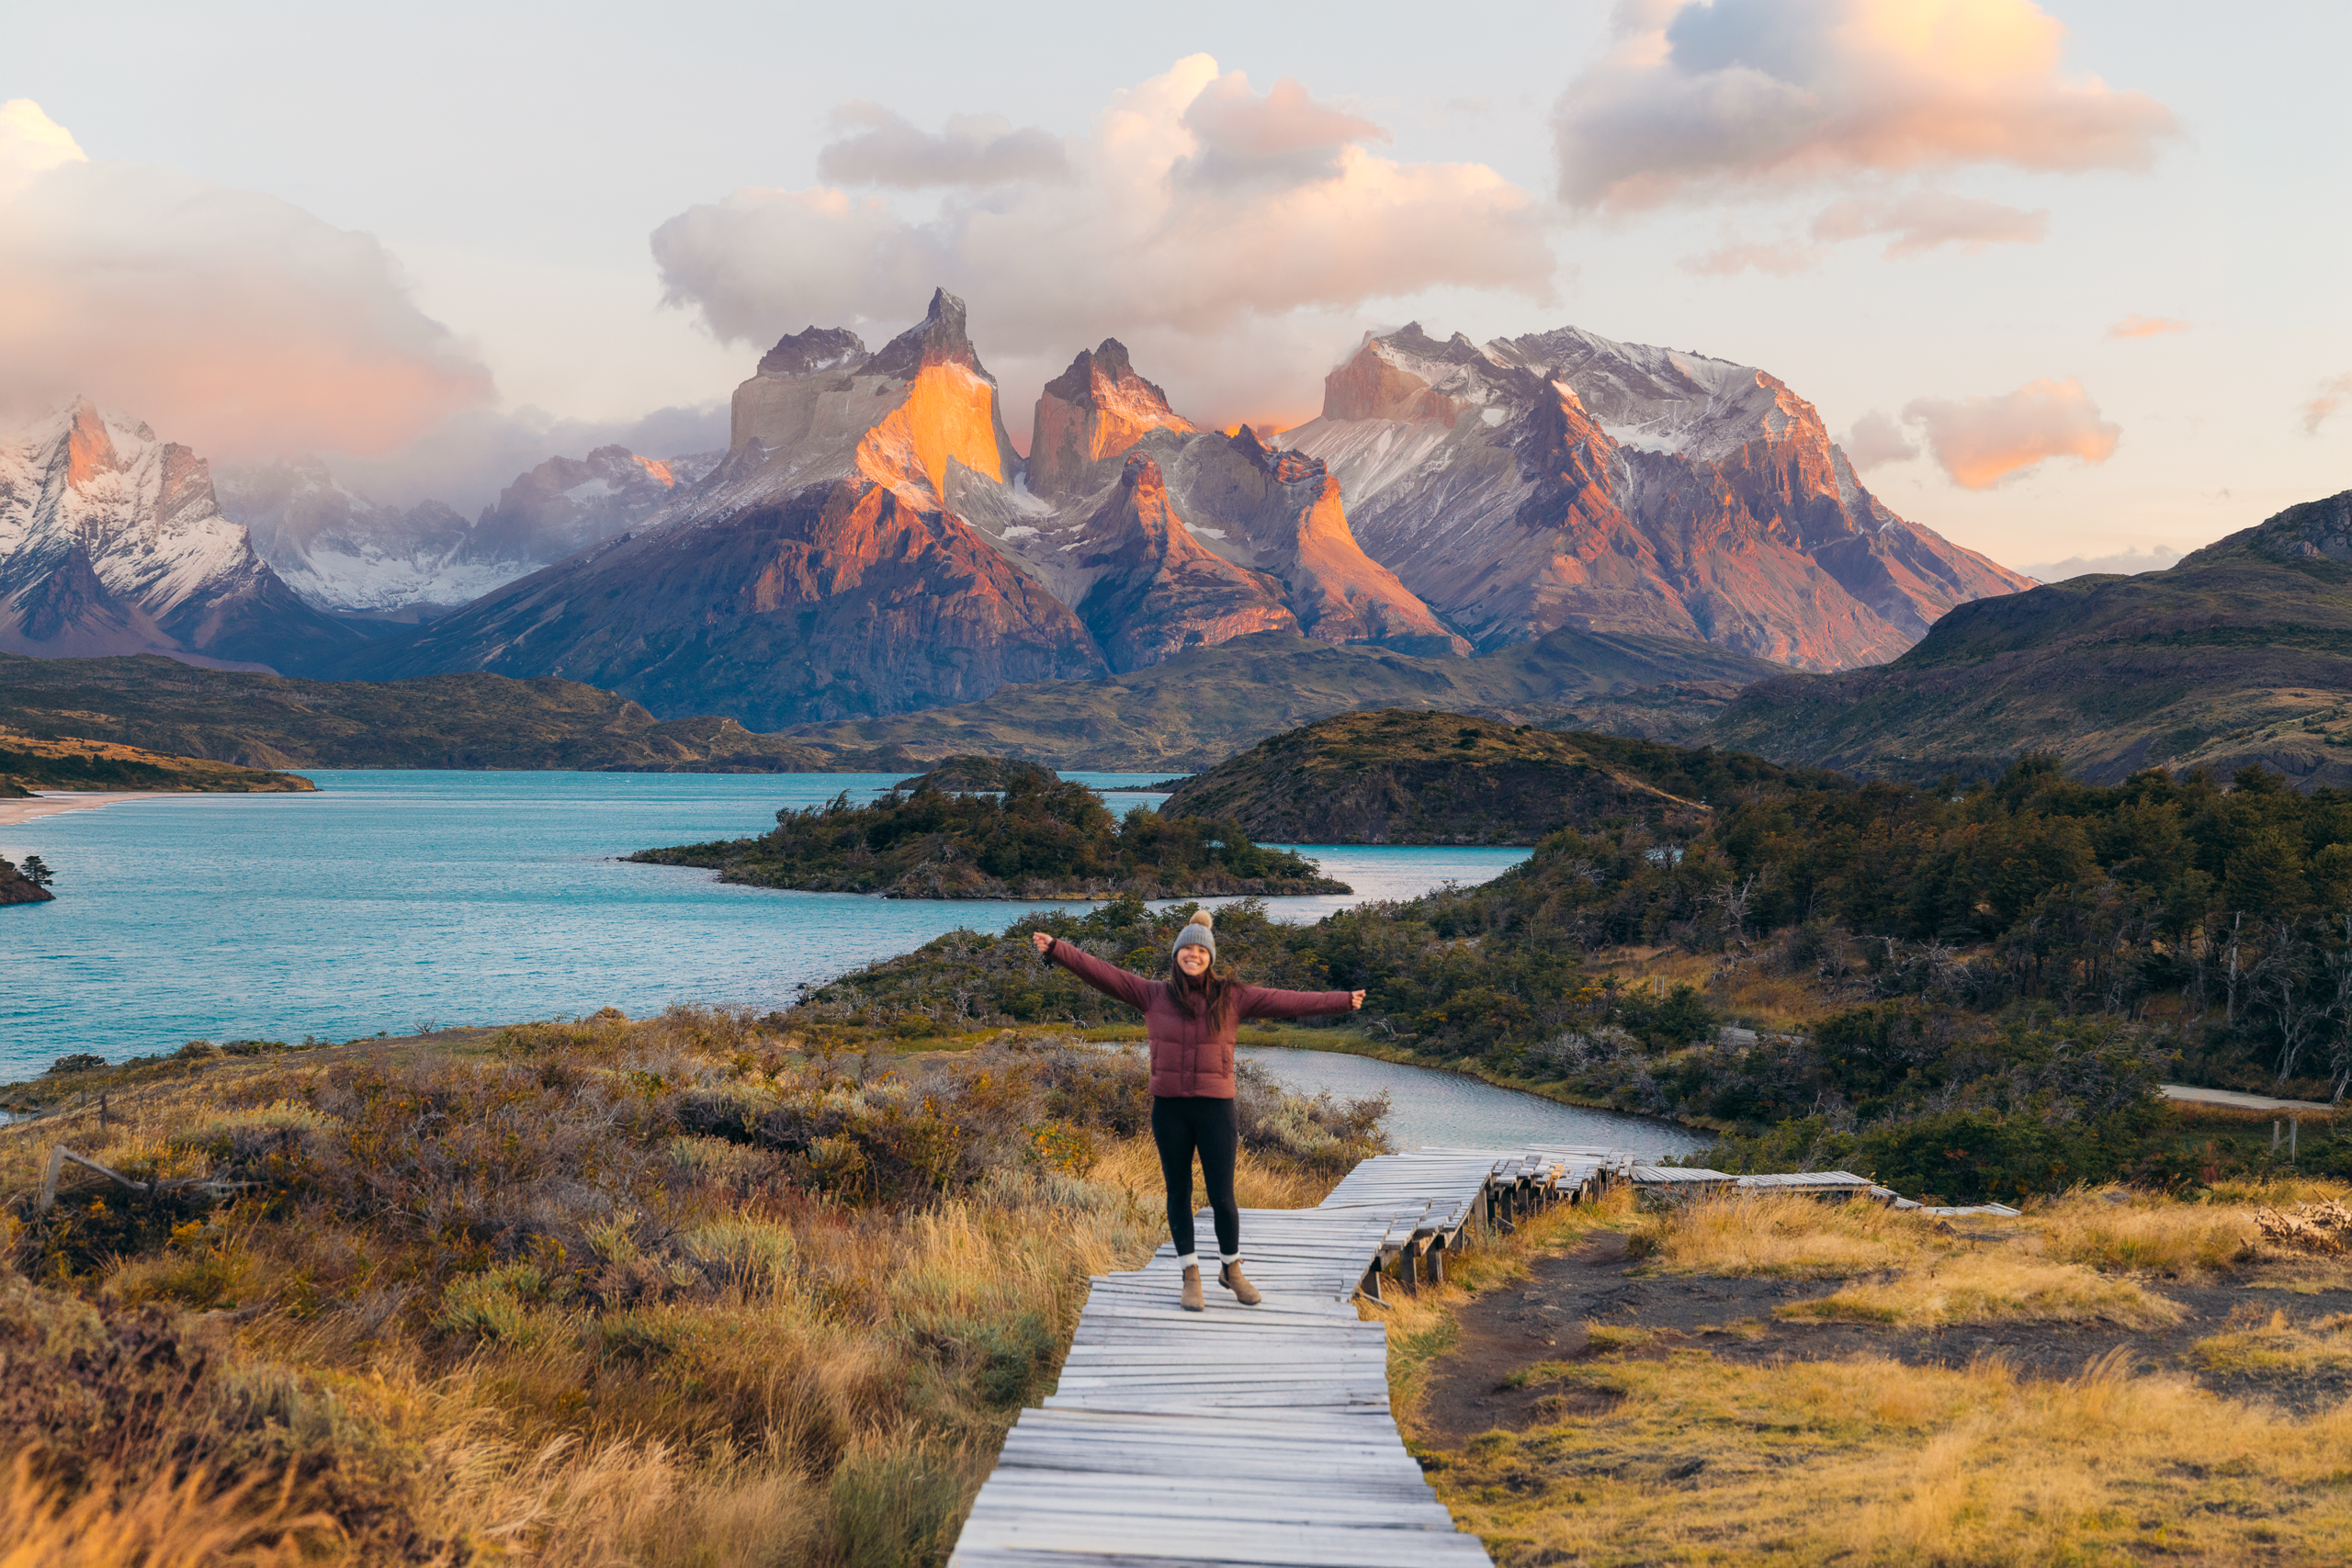
The Ultimate 9-Day Torres del Paine Guide (Patagonia Travel)
Have you ever caught yourself thinking, “I dream of going to Patagonia, but I have absolutely no idea where to begin planning?” You’re not alone.
Patagonia had been at the top of my travel wish list for over a decade, but every time I sat down to plan, I felt overwhelmed by the number of destinations, transportation options, hotels, hikes, and excursions to choose from.
In early March 2026, I finally spent 8 nights and 9 days exploring Torres del Paine National Park at the end of Patagonia’s summer season. In this guide, I’m sharing the exact itinerary I would recommend for a first trip, along with everything I wish I had known before arriving.
We did not book through a tour company or travel by tour bus. My husband and I planned the entire trip ourselves, rented a car, chose our own hotels and excursions, and explored the park independently.
In this guide, I’ll cover why we rented a car, where to find gas, where to stay at every budget, hiking to Mirador Base Torres, horseback riding, puma trekking, and the experiences that were genuinely worth our time. My goal is to make planning your own Torres del Paine trip feel far more manageable.
Torres del Paine at a Glance
- Location: Chilean Patagonia, Chile
- Trip Length: 8 nights, 9 days
- Nearest Airport: Puerto Natales (PNT) or El Calafete (FTE)
- Best Time to Visit: December–March
- Transportation: Rental car recommended
- Fitness Level: Moderate–High (depending on hikes)
- Luxury Friendly: Yes
- Budget Friendly: Yes
- Cell Service: Limited inside the park
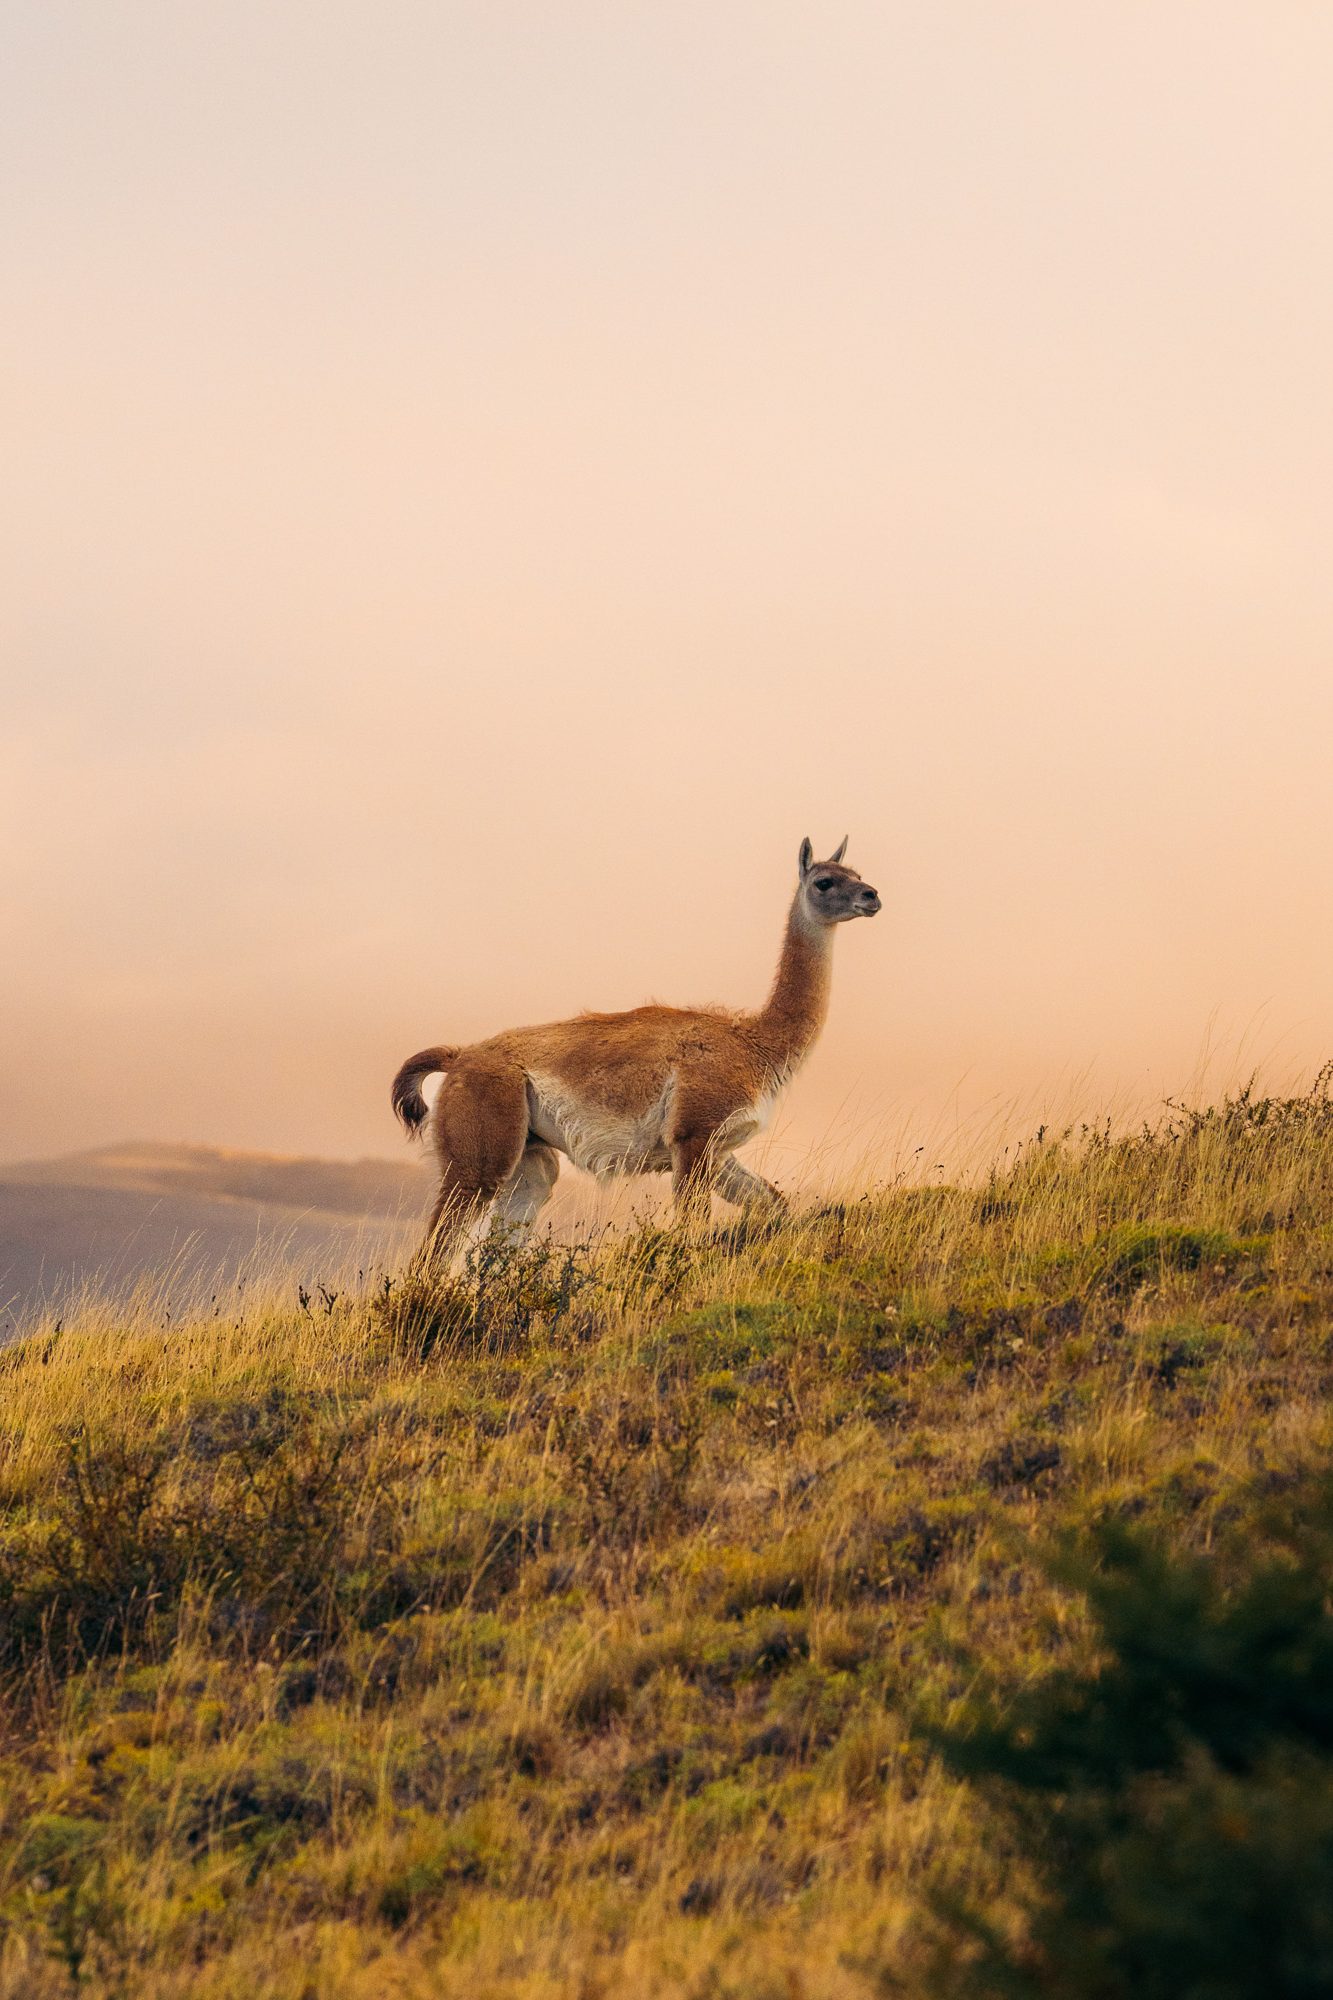
- Wildlife: Guanacos, foxes, condors, pumas, rheas, flamingos
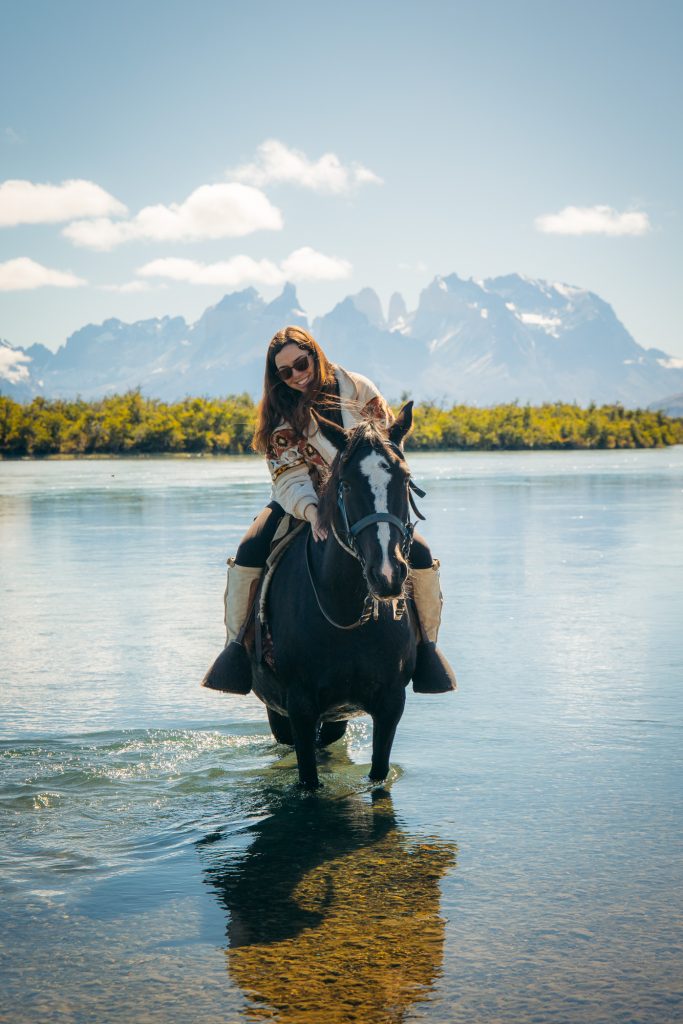
Horseback Riding
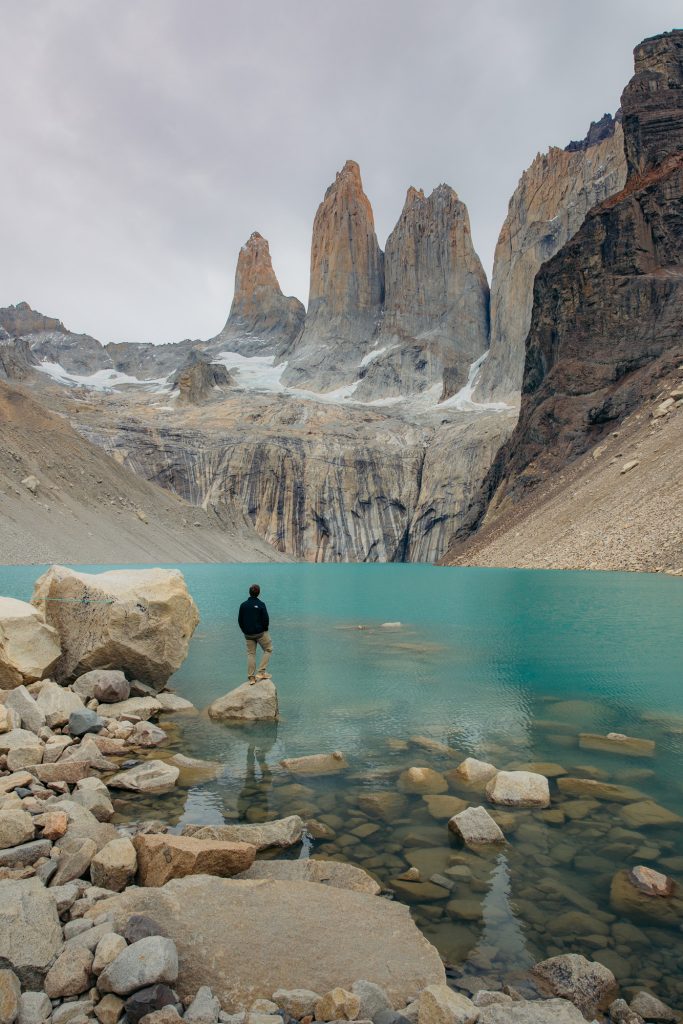
Mirador Base Las Torres
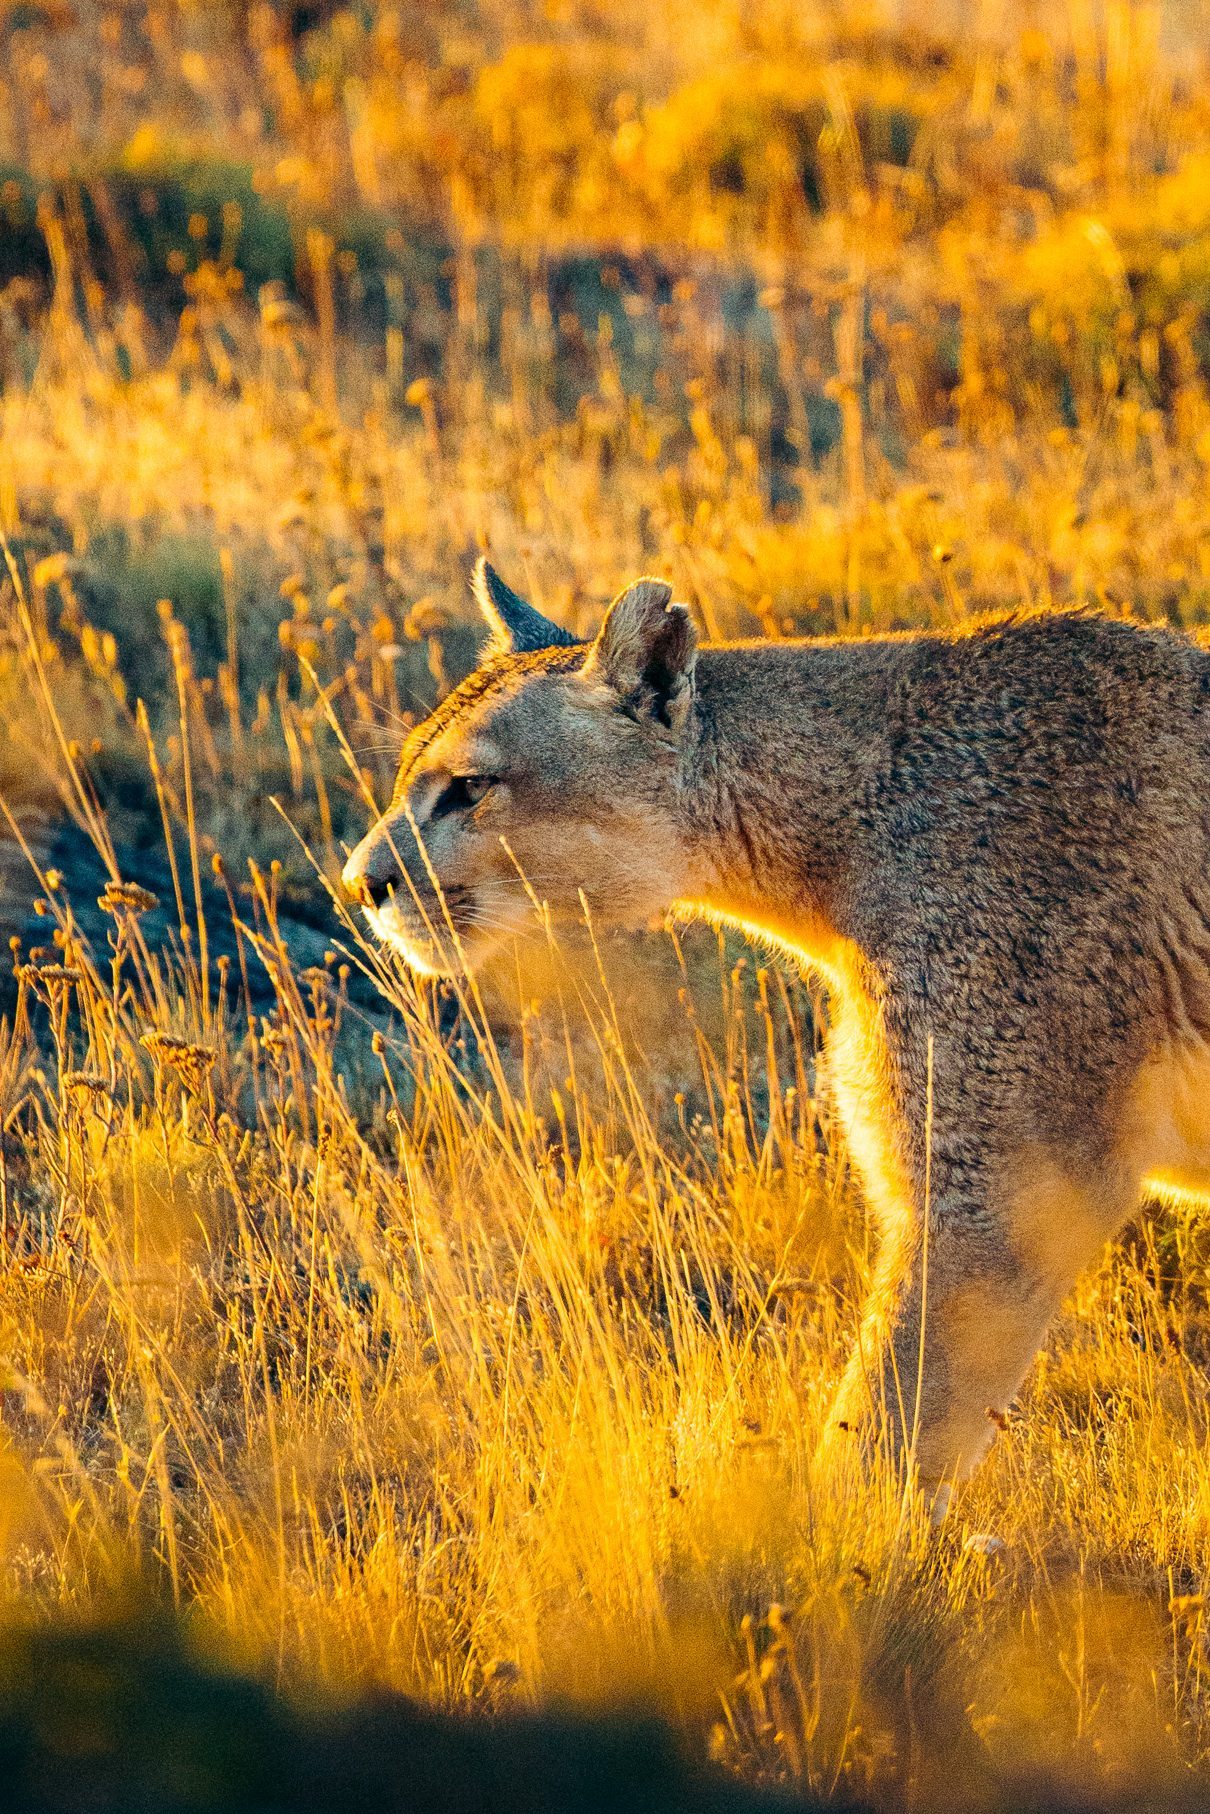
Wildlife Sightings
Table of Contents
- Why Visit Torres del Paine?
- Is this the Right Guide for you?
- What to Book Before You Go
- Where to Stay
- Hiking to Mirador Base Torres: Everything You Need to Know
- Puma Tracking
- Horseback Riding
- Grey Glacier Boat Excursion
- Should You Rent a Car in Torres del Paine?
- Budget
- Packing List
- Photography Tips
- FAQ
- What I’d Do Differently
- RELATED PATAGONIA ARTICLES
Affiliate Disclosure: This post contains affiliate links, which means I may earn a small commission if you make a purchase through one of my links, at no additional cost to you. I only recommend hotels, gear, and experiences I genuinely use or would recommend.
Why Visit Torres del Paine?
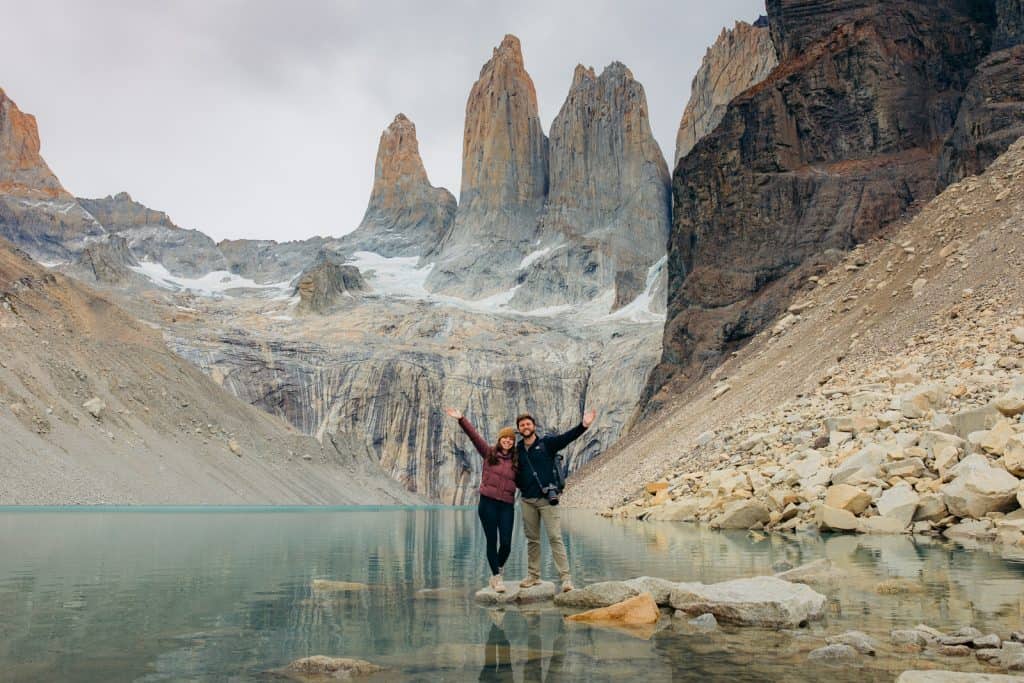
Few places in the world feel as dramatic as Torres del Paine National Park. Glaciers sit beneath twisted granite peaks, guanacos graze across open grasslands, condors circle overhead, and pumas move quietly through the landscape.
Near the southern tip of South America, Torres del Paine National Park captures the sense of wildness that makes Patagonia so unforgettable. It is the kind of place that makes you want to wake before sunrise, spend hours hiking into the mountains, and slow down long enough to notice the wildlife blending almost seamlessly into the scenery.
Even after dreaming about Patagonia for more than a decade, arriving in Torres del Paine still exceeded what I had imagined. The scale of the landscape, the constantly changing weather, and the feeling that something extraordinary could appear around every bend made every day feel like an adventure.
Is this the Right Guide for you?
This guide is designed for first-time visitors planning a self-guided trip to Torres del Paine, without relying on a travel agency or organized tour. It’s especially helpful for travelers looking for a mix of hiking, wildlife, photography, unforgettable accommodations, and the flexibility to explore Patagonia at their own pace.
Everything in this guide is based on the 8-night, 9-day itinerary my husband and I planned ourselves. Whether you’re traveling on a tighter budget, looking for a more luxurious experience, or hoping to fit everything into a shorter itinerary, you can easily adapt these recommendations to fit your own trip.
Throughout this guide, you’ll also find:
- 📍 Google Maps pins for our favorite stops
- 🏨 Hotel recommendations for a range of budgets
- 🥾 Hiking tips and trail difficulty
- 📸 Photography locations and tips
- 🦙 Wildlife spotting tips
- 🚗 Rental car and driving advice
- ⭐ Personal recommendations based on our experience
| Day | Overnight | Main Highlight |
| Day 1 | El Calafate | Arrive in Argentina + pick up rental car |
| Day 2 | Tierra Patagonia | Cross into Chile + scenic drive into Torres del Paine |
| Day 3 | Tierra Patagonia | Horseback riding + exploring the park |
| Day 4 | Tierra Patagonia | Wildlife viewing + puma spotting |
| Day 5 | Tierra Patagonia | Grey Glacier boat excursion |
| Day 6 | EcoCamp Patagonia | Move to EcoCamp + explore the Las Torres sector |
| Day 7 | EcoCamp Patagonia | Mirador Base Torres hike |
| Day 8 | Hostería Pehoé | Lake Pehoé + wildlife + scenic viewpoints |
| Day 9 | Departure | Drive back toward El Calafate |
What To Book Before Visiting Torres Del Paine
I began planning our late-February trip to Torres del Paine about six months in advance, and I still wish I had started sooner.
By that point, rental-car availability was already limited, several of the hotels I was interested in had only one or two nights available, and many of the best rates had disappeared. We were still able to plan an incredible trip within a six-month window, but booking earlier would have given us more flexibility and probably saved us money.
For a summer trip to Torres del Paine, which is December through February, I would begin researching nine to twelve months in advance, particularly if you have specific hotels, room categories, or travel dates in mind.
Prioritize booking these first:
Flights
Once your travel dates are reasonably firm, begin comparing flights into Puerto Natales (PNT), Punta Arenas (PUQ), or El Calafate (FTE). I recommend comparing flight options and prices across all three airports before deciding on your route. Which airport makes the most sense will depend on your overall Patagonia itinerary, flight availability, and how much driving you want to do before reaching Torres del Paine.
We flew into El Calafate, Argentina, rented a car at the airport, and drove across the Argentina–Chile border into Torres del Paine. This gave us the flexibility to combine Argentine and Chilean Patagonia, but it also added an international border crossing, and some important rental-car logistics that I’ll cover below.
Choosing El Calafate as our launching point for this Patagonia adventure was strategically planned around visiting Perito Moreno Glacier and the Perito Moreno Glacier Walkways. Seeing Perito Moreno Glacier was important enough to us that we intentionally chose the longer route through El Calafate, and despite the extra hours of driving, I can confidently say it was worth it.
Approximate drive times to Torres del Paine National Park:
Puerto Natales → roughly 1.5–2.5 hours depending on where in the park you’re headed.
Punta Arenas → roughly 4–5 hours.
El Calafate → roughly 5–7 hours including the international border crossing.
Rental Car
Rental-car inventory can become limited during Patagonia’s busiest summer months, so I would reserve your vehicle as soon as your travel dates are confirmed. I was genuinely surprised by how difficult it was to find an automatic vehicle at El Calafate Airport, many of the available rental cars were manual.
If you’re renting in Argentina and driving into Chile like we did, make sure your rental company allows international border crossings and arrange the necessary paperwork in advance. This is not something I would leave until you arrive at the rental counter. I’ll cover our entire El Calafate-to-Torres del Paine driving experience, border crossing, gas stops, road conditions, and whether I’d rent a car again in the section below.
Accommodations
Hotels inside and near Torres del Paine have relatively limited inventory, and popular luxury properties, all-inclusive lodges, refugios, and campsites can fill well in advance, particularly if you need several consecutive nights. During our trip, we stayed at Tierra Patagonia, EcoCamp Patagonia, and Hotel Lago Pehoé, and even six months out, availability at some of the properties I was considering was already limited. If you have your heart set on a specific hotel or accommodation, I would make this one of the first things you book.
Torres del Paine National Park tickets
Park admission should be purchased online before arriving at Torres del Paine (official website linked here). Unlike hotels or rental cars, this isn’t something you necessarily need to book months in advance, but I would still purchase your tickets before leaving for Patagonia.
Once purchased, I recommend saving a digital copy that’s accessible offline and bringing a printed copy for good measure. Cell service throughout the park is limited, and the last thing you want is to finally reach the entrance only to blankly stare at the gate agent while your ticket refuses to load.
Ticket prices, categories, and entry requirements can change, so I recommend checking the current requirements and purchasing your tickets through the official Chilean national parks platform before your trip.
Puma tracking
Puma tracking was one experience I knew I didn’t want to miss, and I recommend booking a dedicated excursion as soon as your itinerary is set. Private guides and wildlife operators have limited availability, particularly during Patagonia’s busiest months, so this isn’t an activity I would leave until the last minute. I recommend comparing puma-tracking tours and availability before finalizing the rest of your activities.
I’ll share much more about our experience puma tracking—and what you can realistically expect—in the experiences section below.
Horseback riding and other excursions
Horseback riding and other excursions offered considerably more flexibility during our trip. We booked one of our rides through Tierra Patagonia only one or two months in advance, while our second horseback ride was available the same week we wanted to go. We likely got lucky with that one, though, and if there’s a particular experience you have your heart set on, I’d still reserve it before arriving in Patagonia.
You can browse horseback riding and other Torres del Paine excursions here.
Where to Stay in Torres del Paine
One thing I underestimated while planning our trip was just how spread out accommodations are throughout Torres del Paine. Where you stay can have a major impact on how much driving you do each day, which trailheads and activities are easiest to reach, and ultimately, how much your trip costs.
Tierra Patagonia
EcoCamp Patagonia
Hosteria Pehoe
During our 9-day trip, we stayed at three very different properties: Tierra Patagonia, EcoCamp Patagonia, and Hostería Pehoé. This gave us firsthand experience with several locations and accommodation styles throughout the park, from an incredible luxury lodge to one of Patagonia’s most recognizable glamping properties and a more affordable hotel option.
There are accommodations for a range of budgets, but inventory is limited compared with most major travel destinations. If you’re visiting during the busy summer season, I recommend booking your accommodations as early as possible, particularly if you want to stay inside or immediately surrounding the park.
Hotels I Stayed At in Torres del Paine
Tierra Patagonia: Best Luxury Hotel
Location: Eastern edge of Torres del Paine National Park, overlooking Lake Sarmiento
Best For: Luxury, all-inclusive experience & guided adventures
Stay Style: Luxury lodge
Includes: Meals, open bar & guided excursions*
My Verdict: 5 stars — definitely my favorite stay in Torres del Paine
→ Check Tierra Patagonia rates & availability
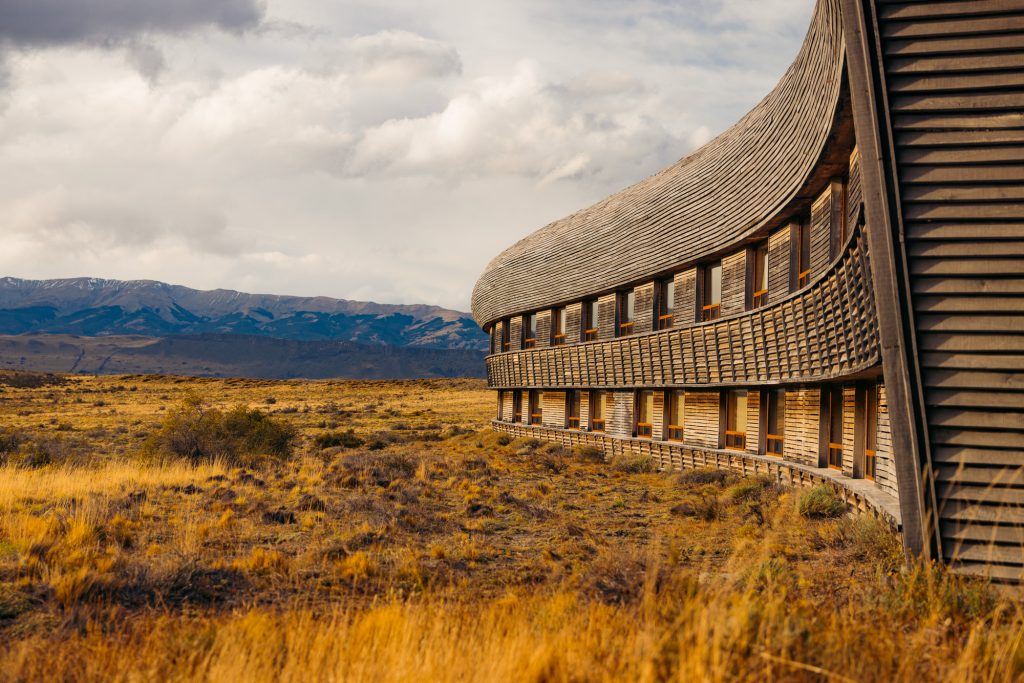
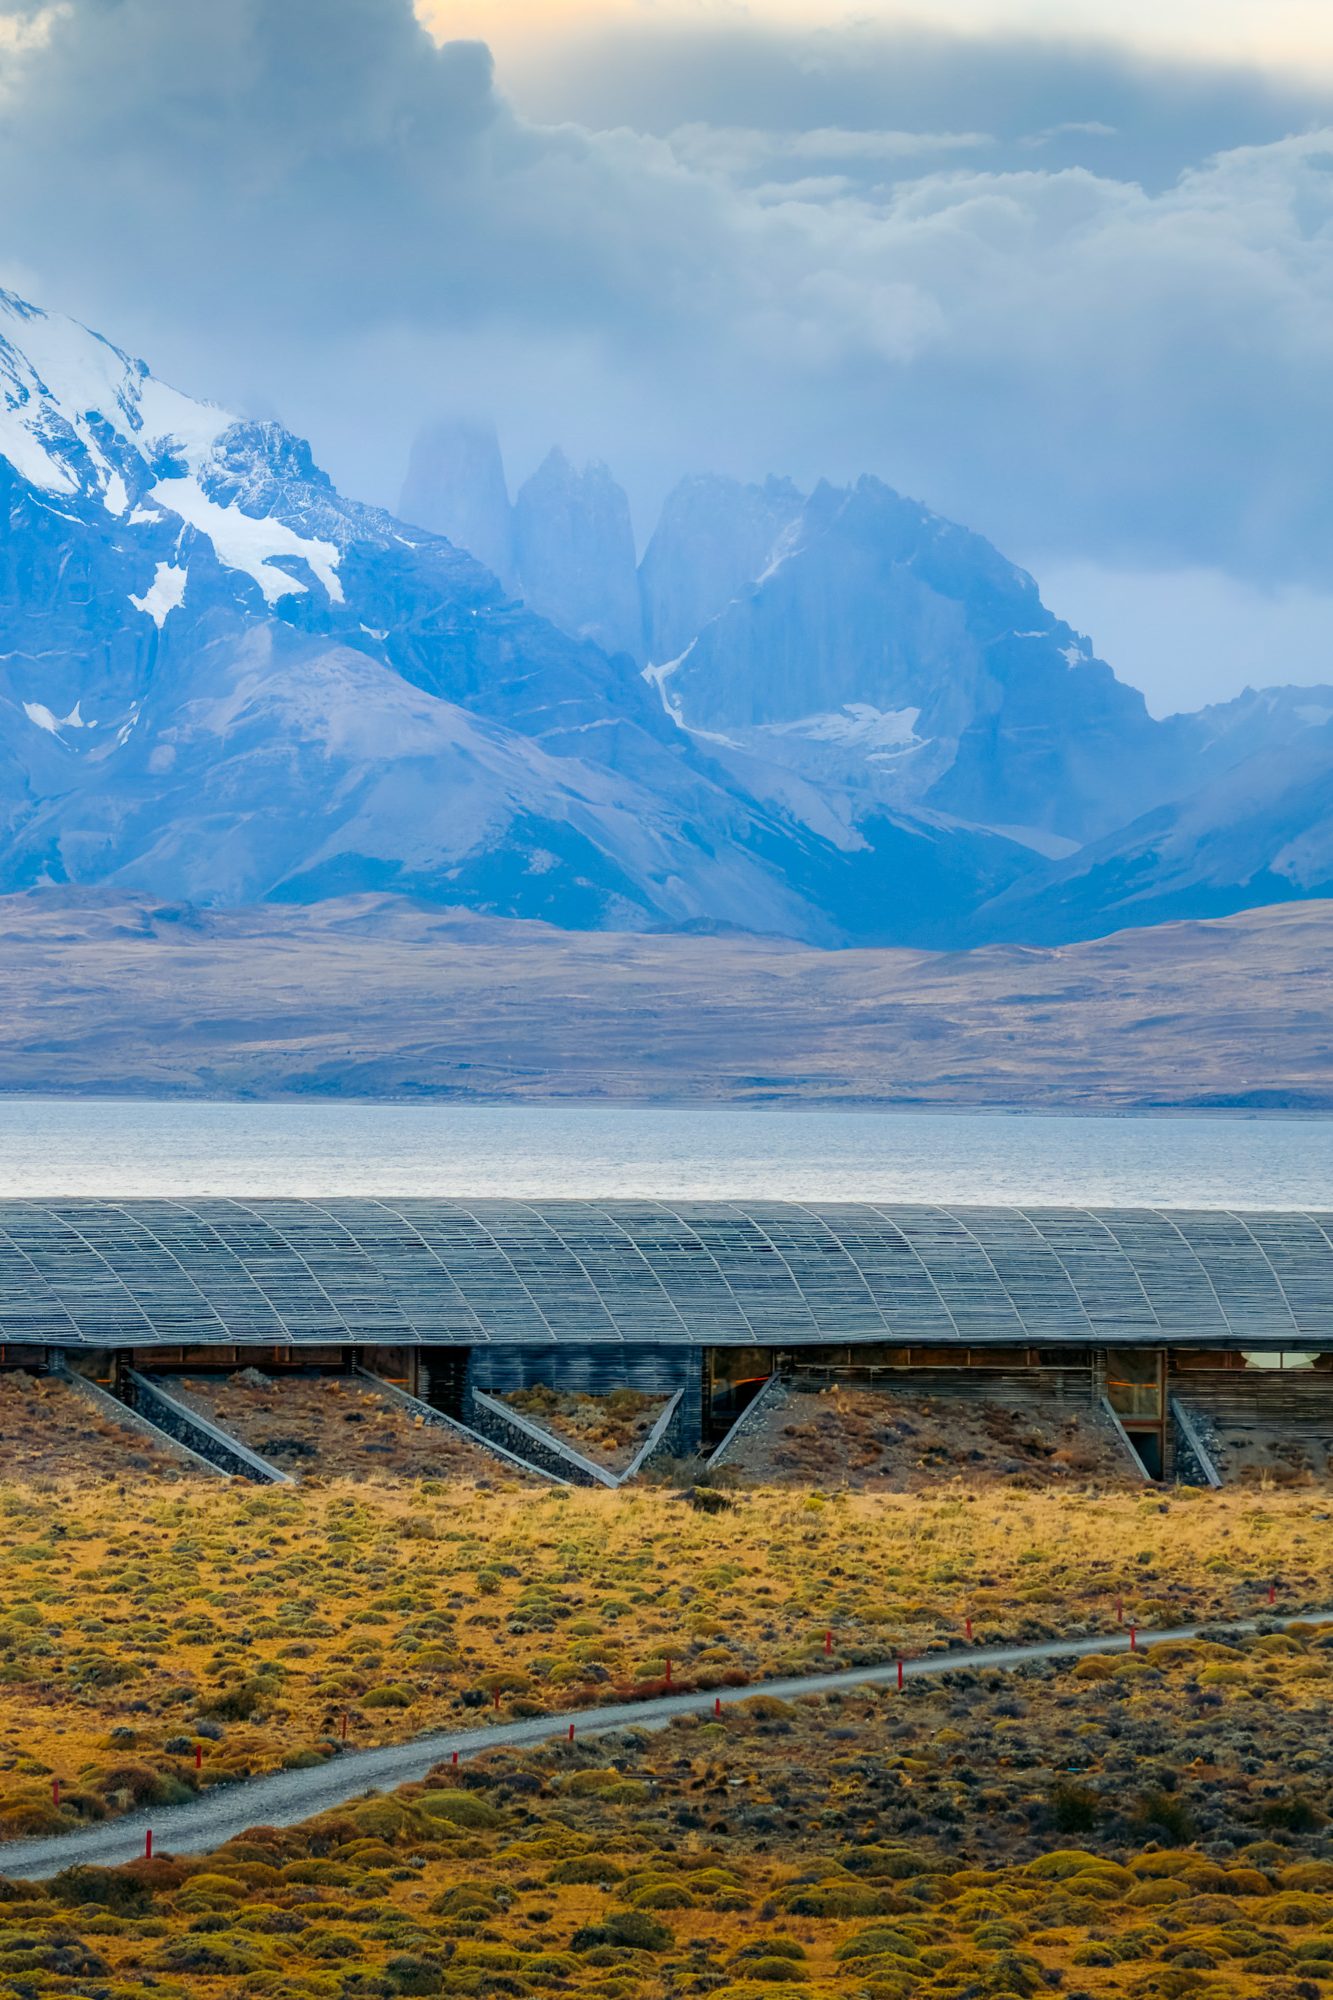
We chose Tierra Patagonia because we wanted to experience the higher-end luxury hospitality side of Patagonia, and it ended up being our favorite stay of the entire trip. Knowing our meals and beverages were included was a huge selling point, but so was having expert guides on property who could take us horseback riding, hiking, fly fishing, puma tracking, and on other adventures throughout Torres del Paine National Park.
There’s a reason the property has earned Three MICHELIN Keys.
The hotel’s location was one of my favorite things about it. Tierra sits overlooking Lake Sarmiento, with expansive views toward the Paine Massif in the distance. Rather than being directly beneath the mountains, you’re far enough away to appreciate the enormous scale of the landscape, which became especially beautiful as the light changed throughout the day.
And then there was our room. I genuinely don’t know if I’ve ever slept in a hotel bed that comfortable. Our room had a private soaking tub and automatic curtains that opened to reveal views across Lake Sarmiento toward the mountains. Guanacos regularly wandered past our window, along with the occasional fox, and we were told that guests have even spotted pumas around the property, although that’s considerably rarer.
The food was another highlight. Each meal incorporated regional Patagonian ingredients alongside Chilean wines, and somehow dinner became something we looked forward to just as much as the day’s adventures. I still think about the seared Patagonian shrimp and scallops (ostiones) with creamy mote, seasoned with ají/merkén, finished with an aioli or creamy emulsion and fresh herbs, and I’m determined to recreate it at home.
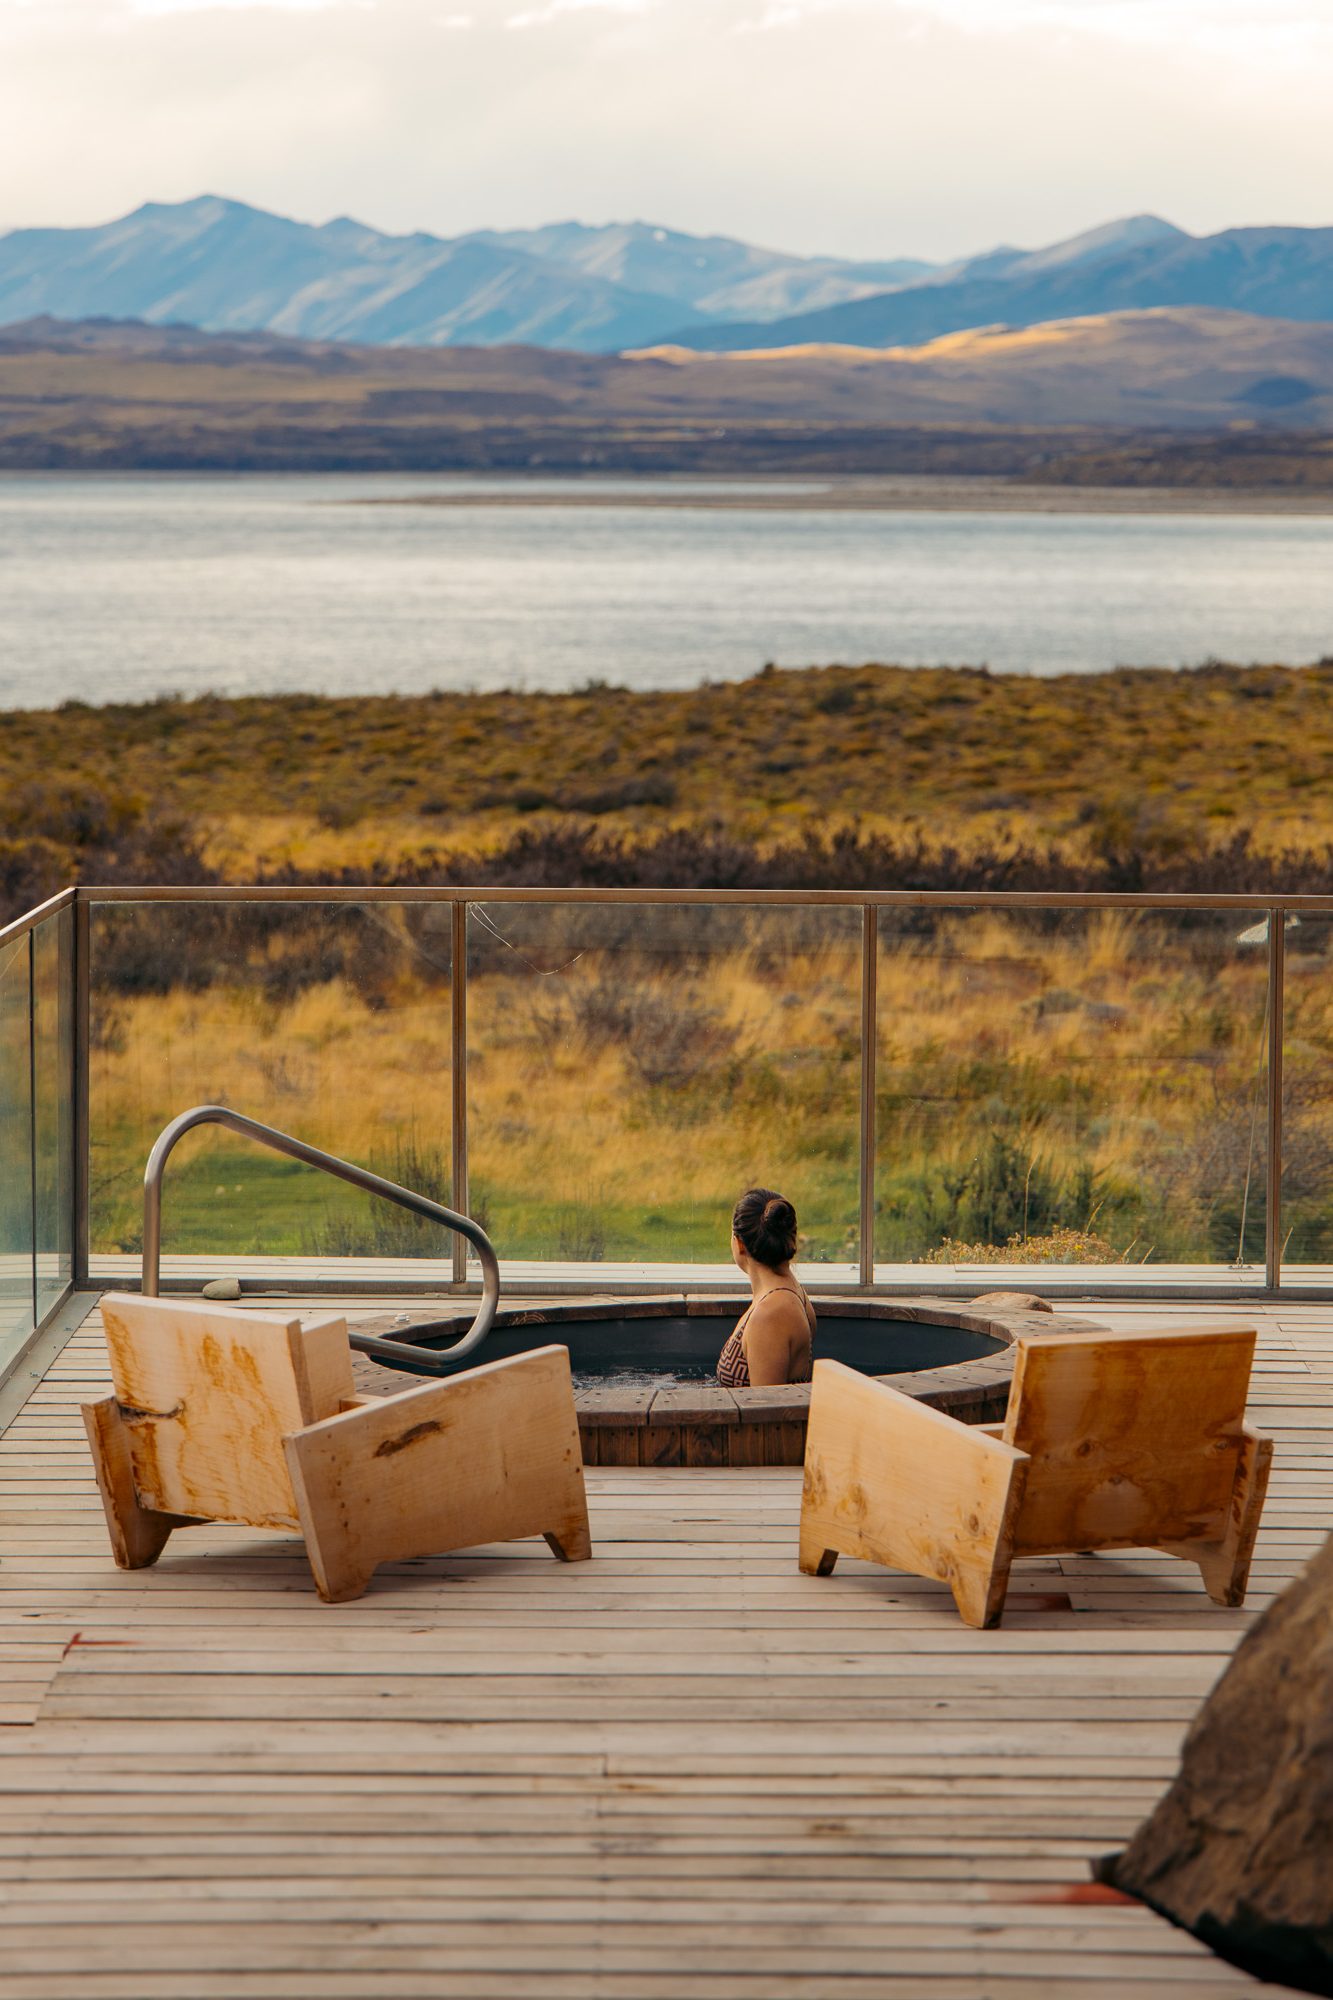

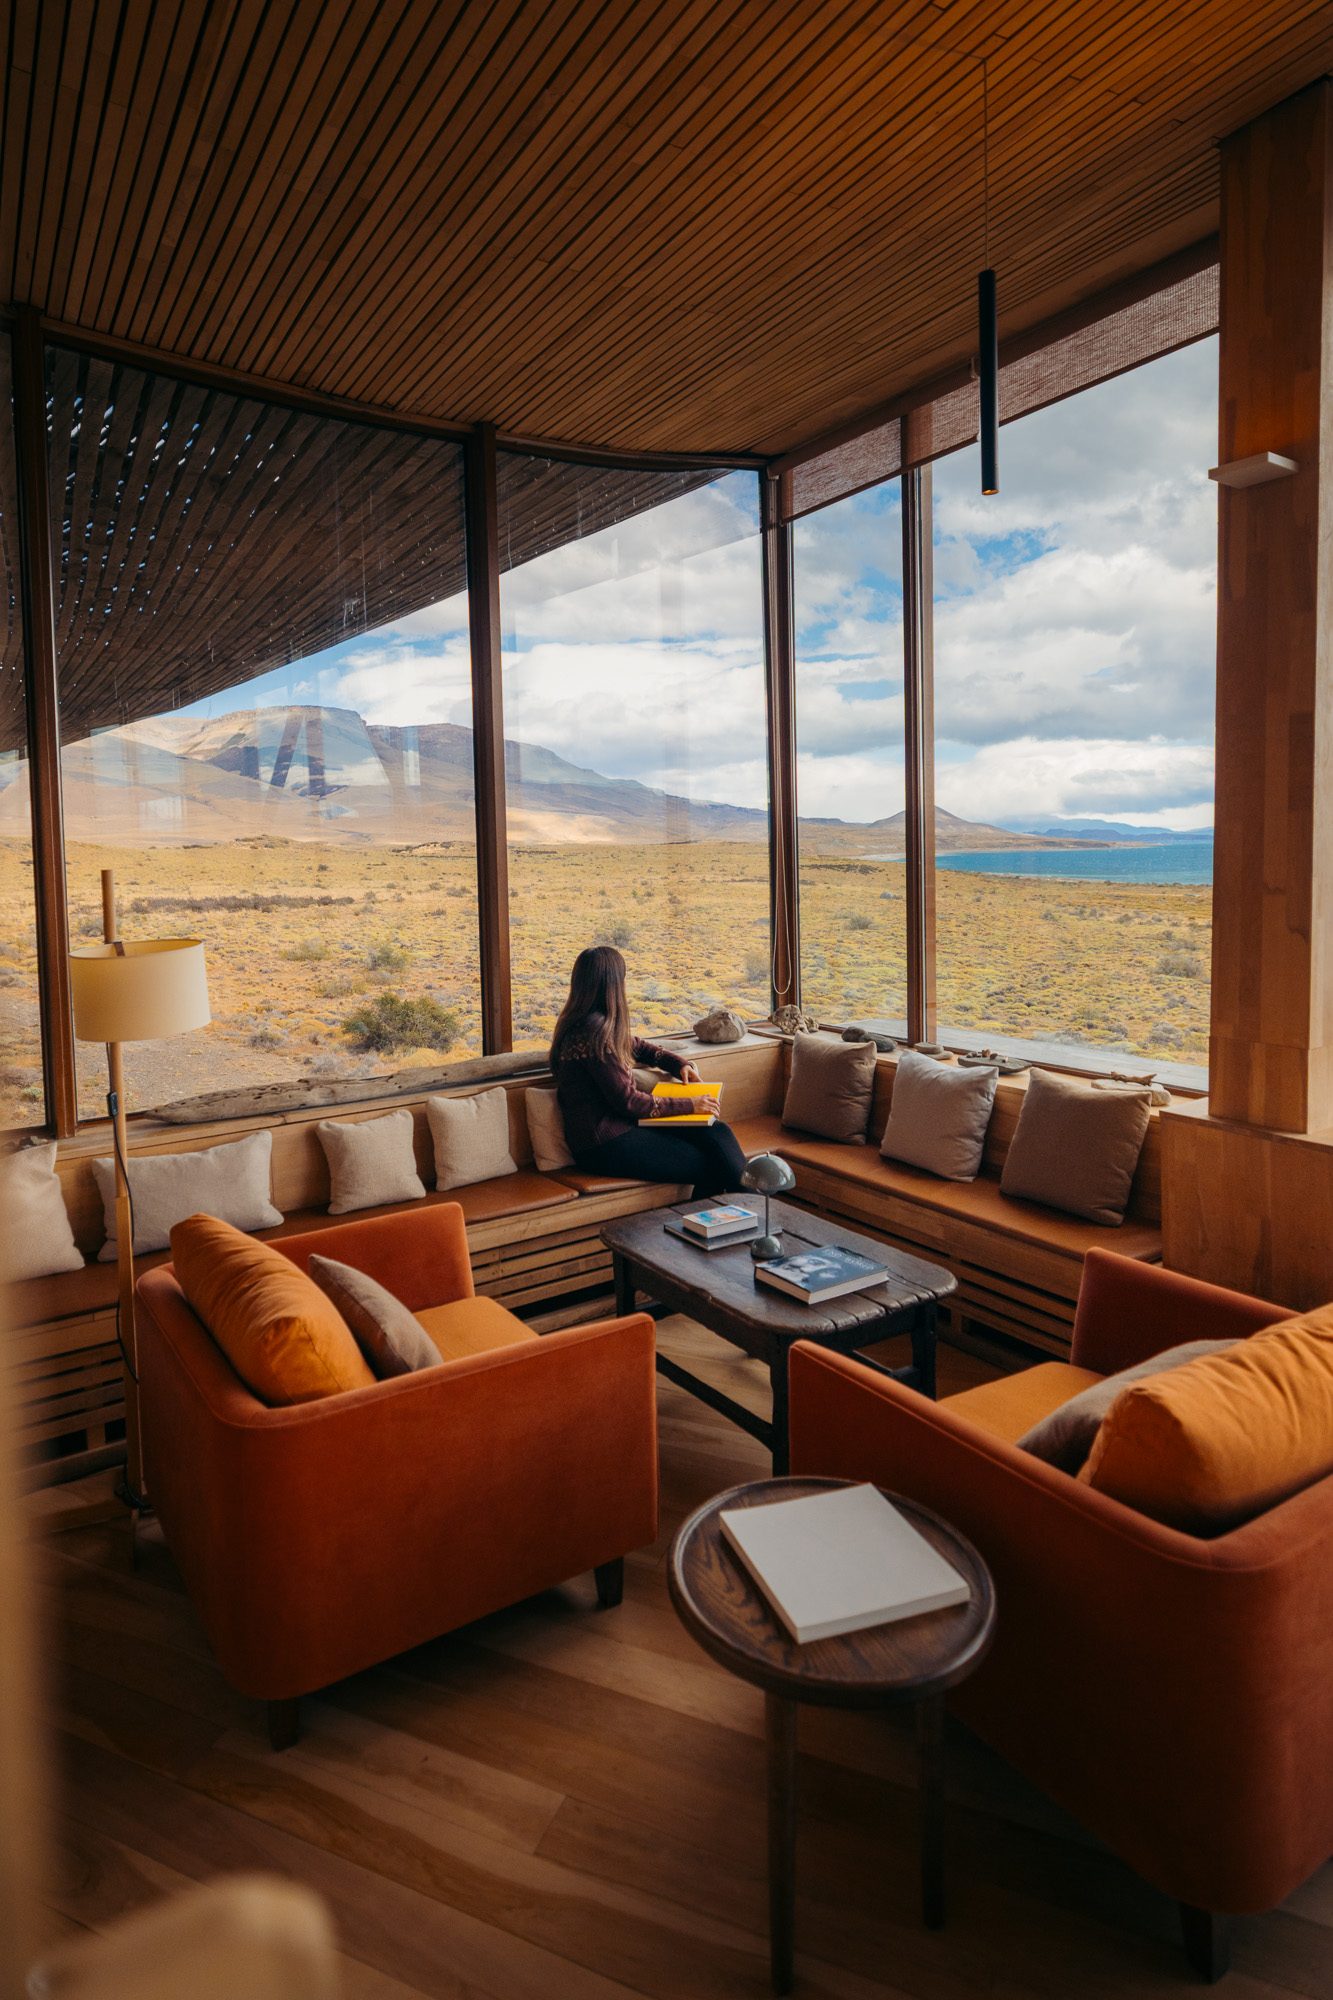
The guides were equally impressive. Everyone we spent time with was professional, knowledgeable, and genuinely passionate about the landscape and wildlife. Having the logistics of our excursions handled for us also meant that once we arrived, we could stop thinking about planning every detail and simply enjoy being there.
I loved all three of our stays in Torres del Paine for completely different reasons, but if I could only return to one, Tierra Patagonia would be my choice. The combination of luxury, hospitality, food, location, and access to expertly guided adventures was difficult to beat.
Best for: Travelers looking for a true luxury Patagonia experience where the logistics are largely handled for you, leaving you more time to actually be present and enjoy the destination.
→ Read my full Tierra Patagonia review — coming soon
EcoCamp Patagonia: Best Unique Stay in Torres del Paine
Location: Las Torres sector of Torres del Paine National Park
Best For: Hiking, glamping & a social atmosphere
Stay Style: Geodesic dome eco-lodge
Includes: Varies by package; our Full Board stay included meals
My Verdict: 4.5 stars — one of the most memorable places I’ve ever stayed
→ Check EcoCamp Patagonia rates & availability
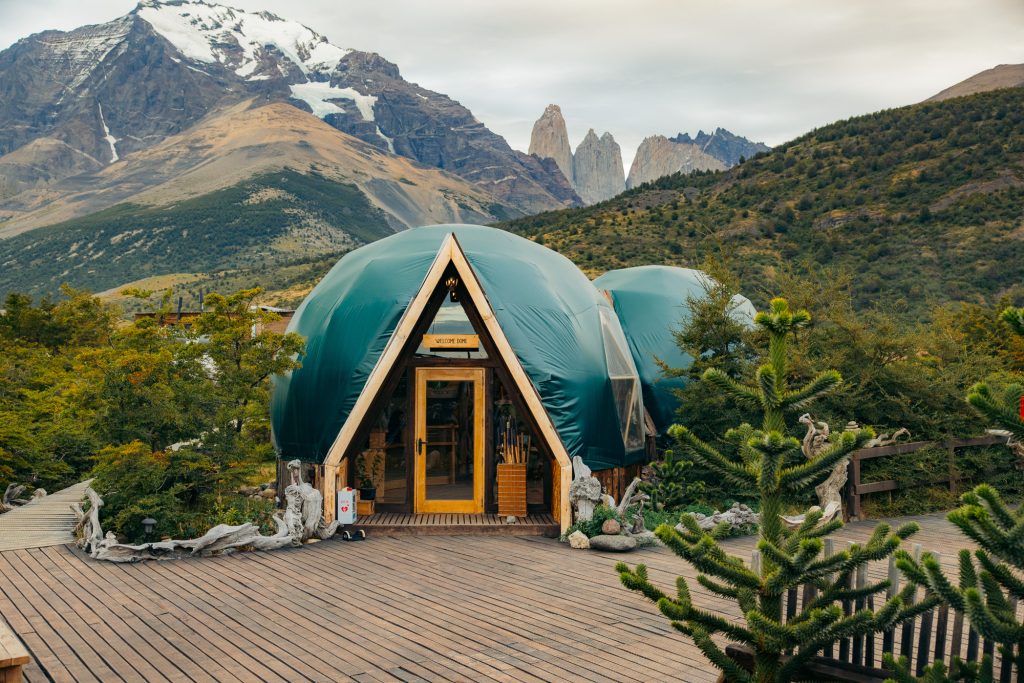
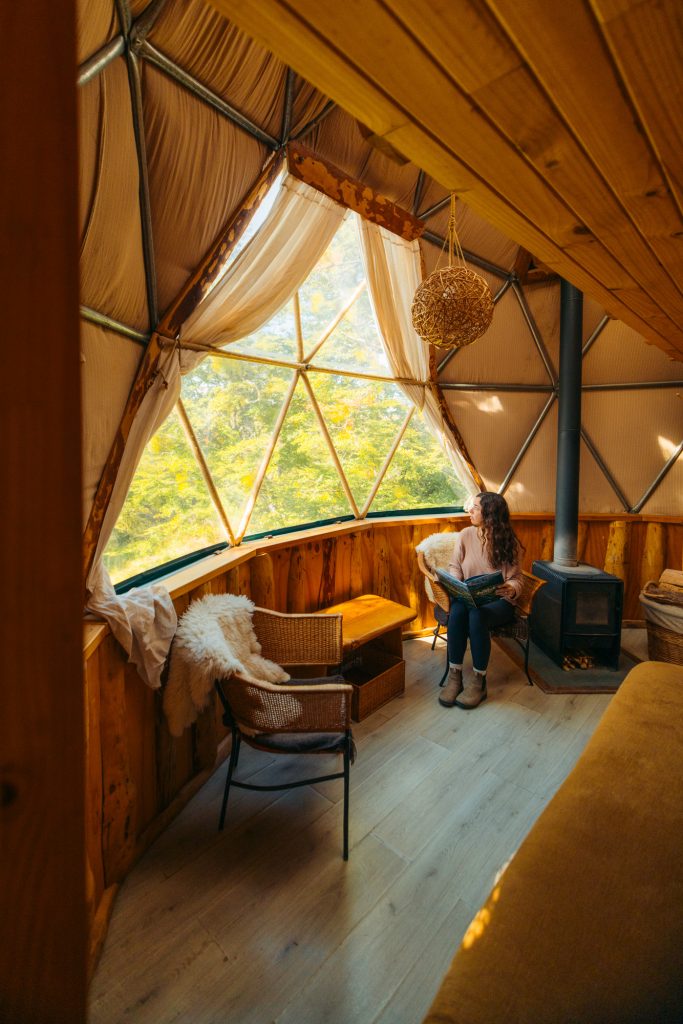
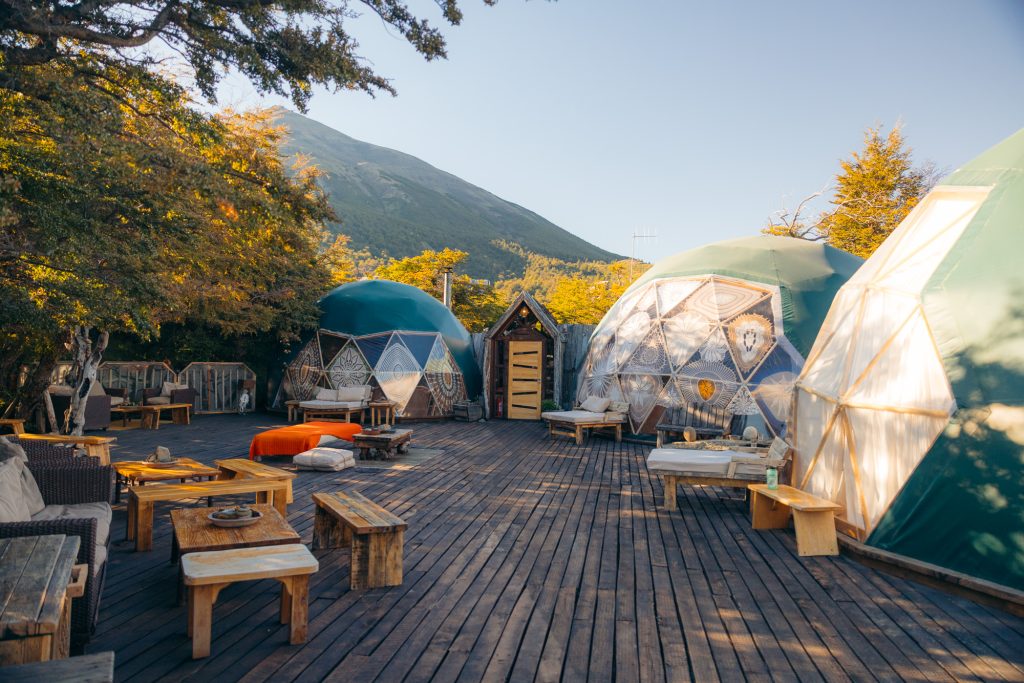
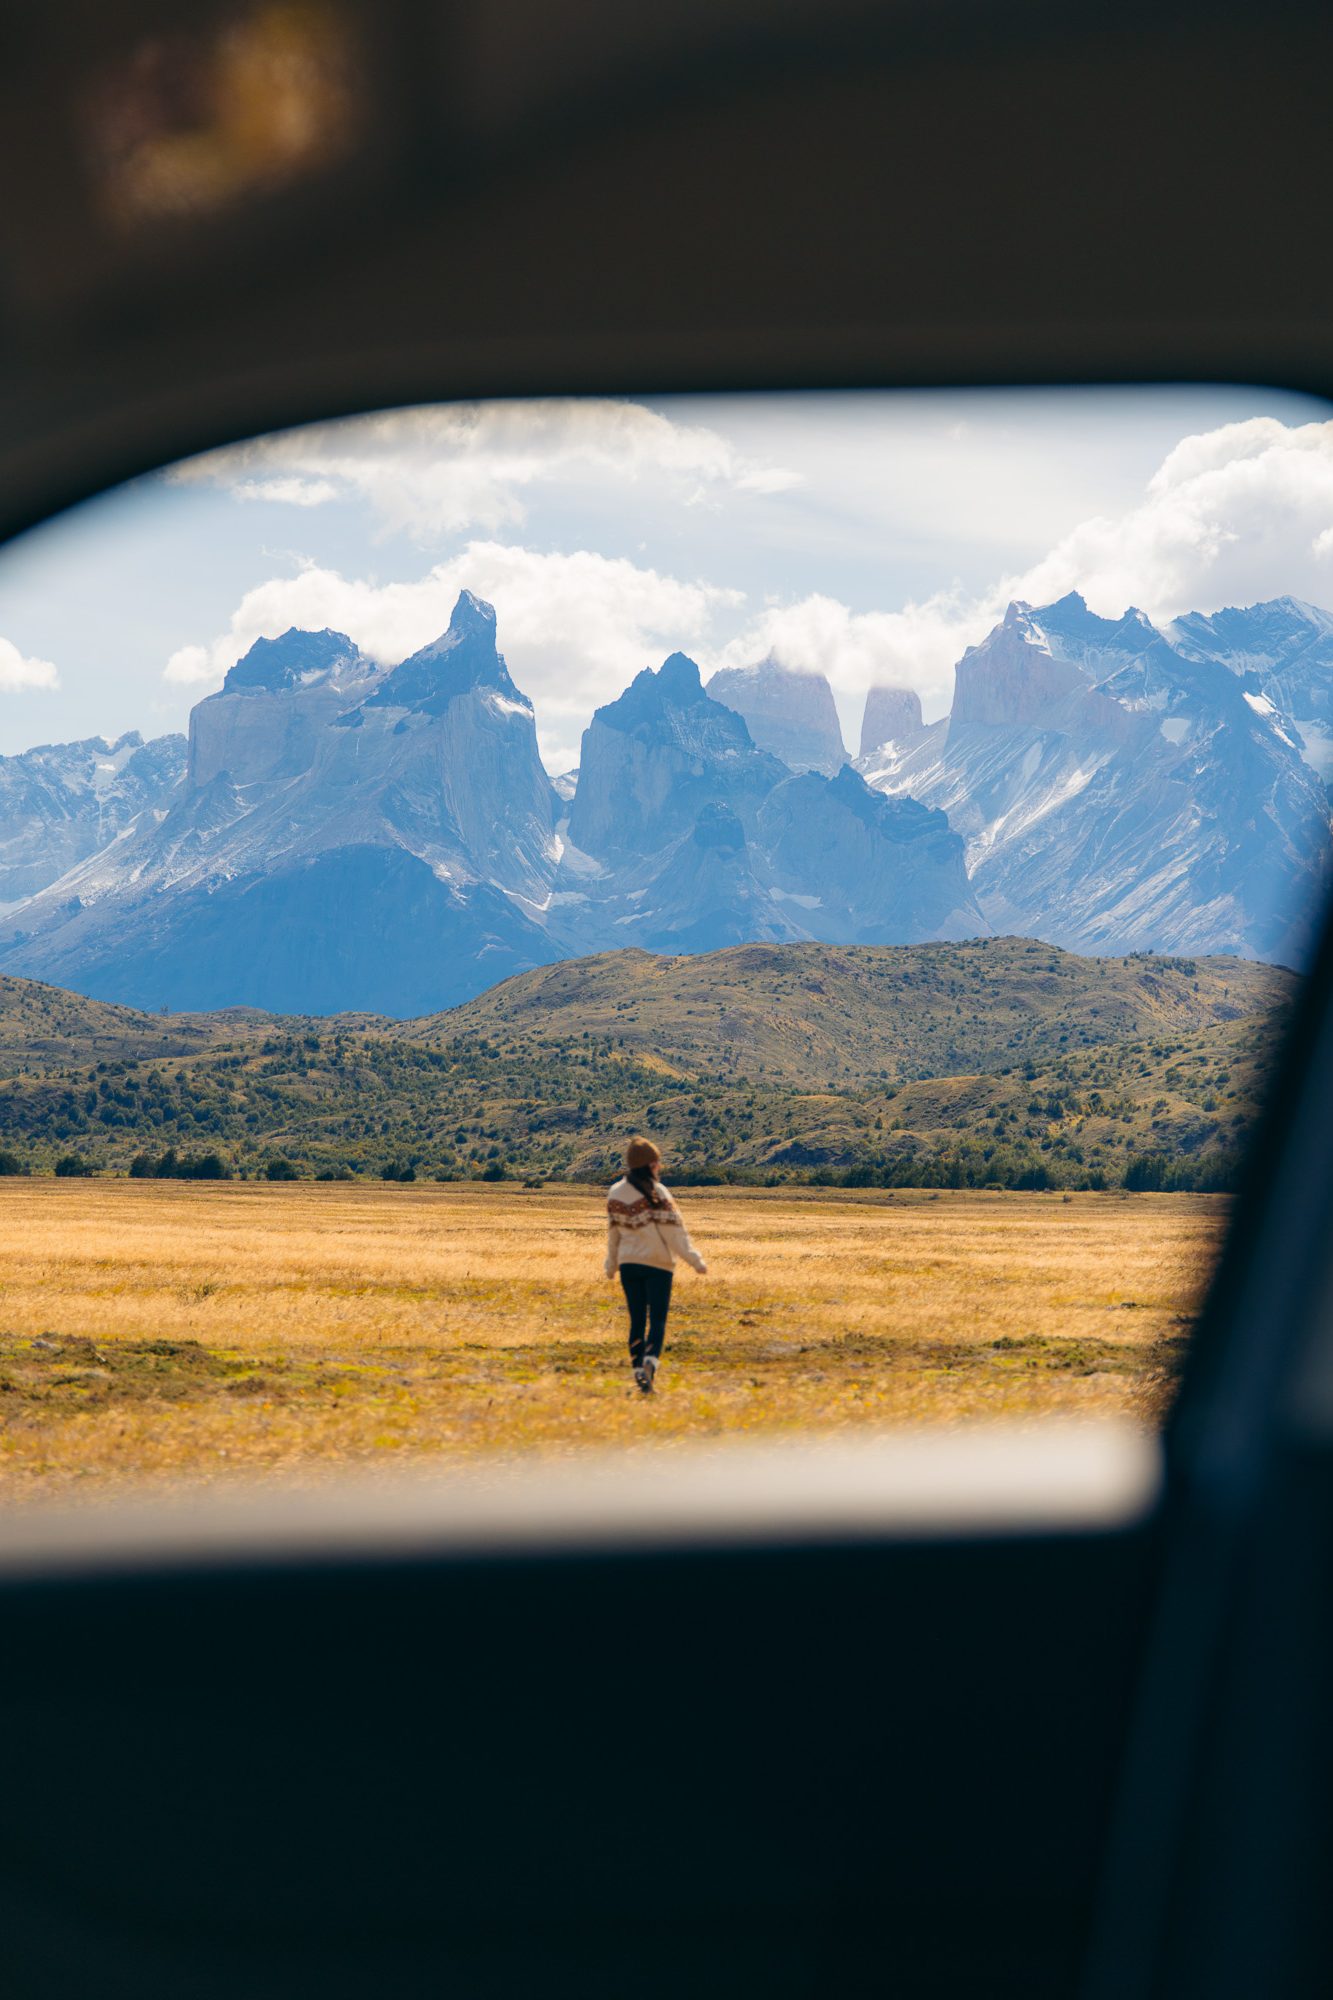
The unique geodesic domes were what initially drew us to EcoCamp Patagonia, but the location ultimately sealed the deal. EcoCamp sits beneath the mountains with views toward the famous granite towers of Torres del Paine, and you can begin the 14 mile hike to Mirador Base Torres directly from the property. Since this was the major hike we planned to tackle during our trip, staying here made perfect sense.
We experienced two different accommodation styles during our stay. For two nights, we stayed in a Suite Dome Loft, complete with a private bathroom and shower, comfortable queen bed, sitting area beside the fire, and an upstairs loft. We also spent one night in a Standard Dome, which was much simpler, with a queen bed and shared bathroom facilities. I was initially hesitant about the shared showers, but we never found ourselves waiting to use one.
We booked EcoCamp’s Full Board option, so breakfast, dinner, and packed lunches for our days exploring were included. But what I remember most was the atmosphere surrounding the meals. Each evening, we’d sit down with our group and guide over a welcome drink, pull out a map, and talk through the next day’s adventure. Everyone seemed equally excited to be exploring this incredible corner of the world, and we ended up making great friends during our stay.
We also chose to hike the Mirador Base Torres with an EcoCamp guide, which ended up adding so much to the experience. Instead of simply hiking toward the viewpoint, we stopped along the way to learn about the landscape, environment, and history of the park. I’ll dive much deeper into the hike later in this guide.
EcoCamp also places a major emphasis on sustainability, with renewable energy, waste-management systems, composting toilets, and an overall design intended to minimize its footprint on the surrounding landscape.
If there’s one thing to consider before booking, it’s how communal you want your experience to be. If shared bathrooms and a more social camping atmosphere aren’t your thing, I’d choose one of the Suite Domes rather than a Standard Dome.
I would absolutely stay at EcoCamp Patagonia again. I’ve always loved camping, and EcoCamp captured everything I love about it while turning it into a far more elevated experience. Coming home to a warm, cozy dome after a huge day of hiking in Patagonia was pretty hard to beat.
Best for: Travelers who love hiking and the outdoors, want easy access to Mirador Base Torres, and like the idea of combining camping with a more comfortable and social experience.
→ Check EcoCamp Patagonia rates & availability
→ Read my full EcoCamp Patagonia review — coming soon
Hostería Pehoé: Best Value for an Iconic Location
Location: On a small island in Lake Pehoé, inside Torres del Paine National Park
Best For: Incredible views, photography & better value
Stay Style: Traditional hotel
Includes: Accommodation; café and restaurant on property
My Verdict: 4 stars — cozy, affordable and hard to beat for the location
→ Check Hostería Pehoé rates & availability
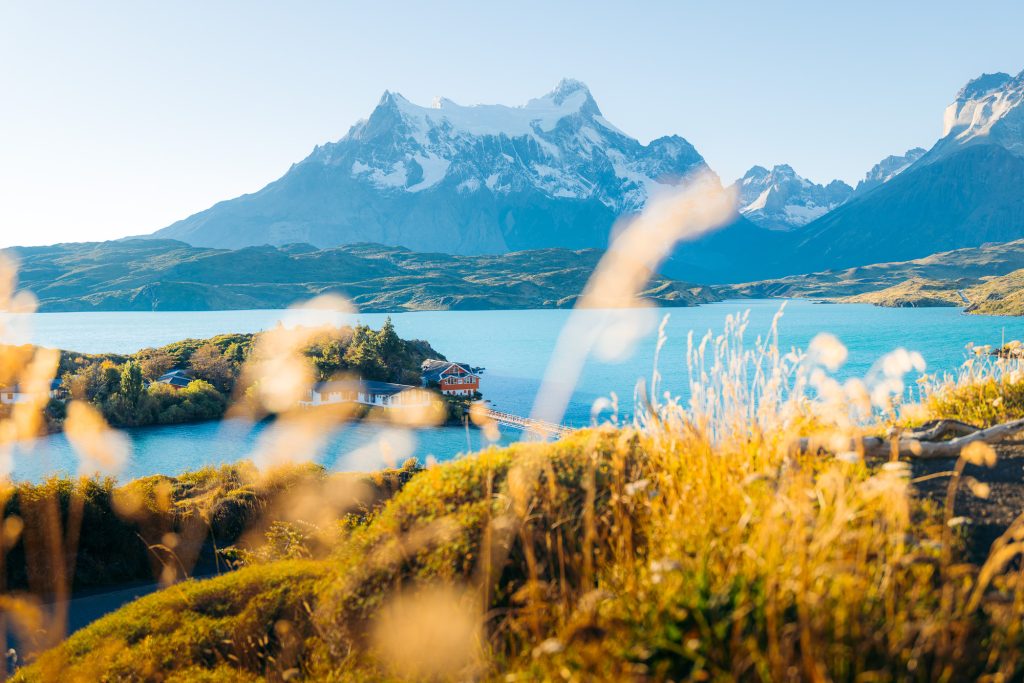
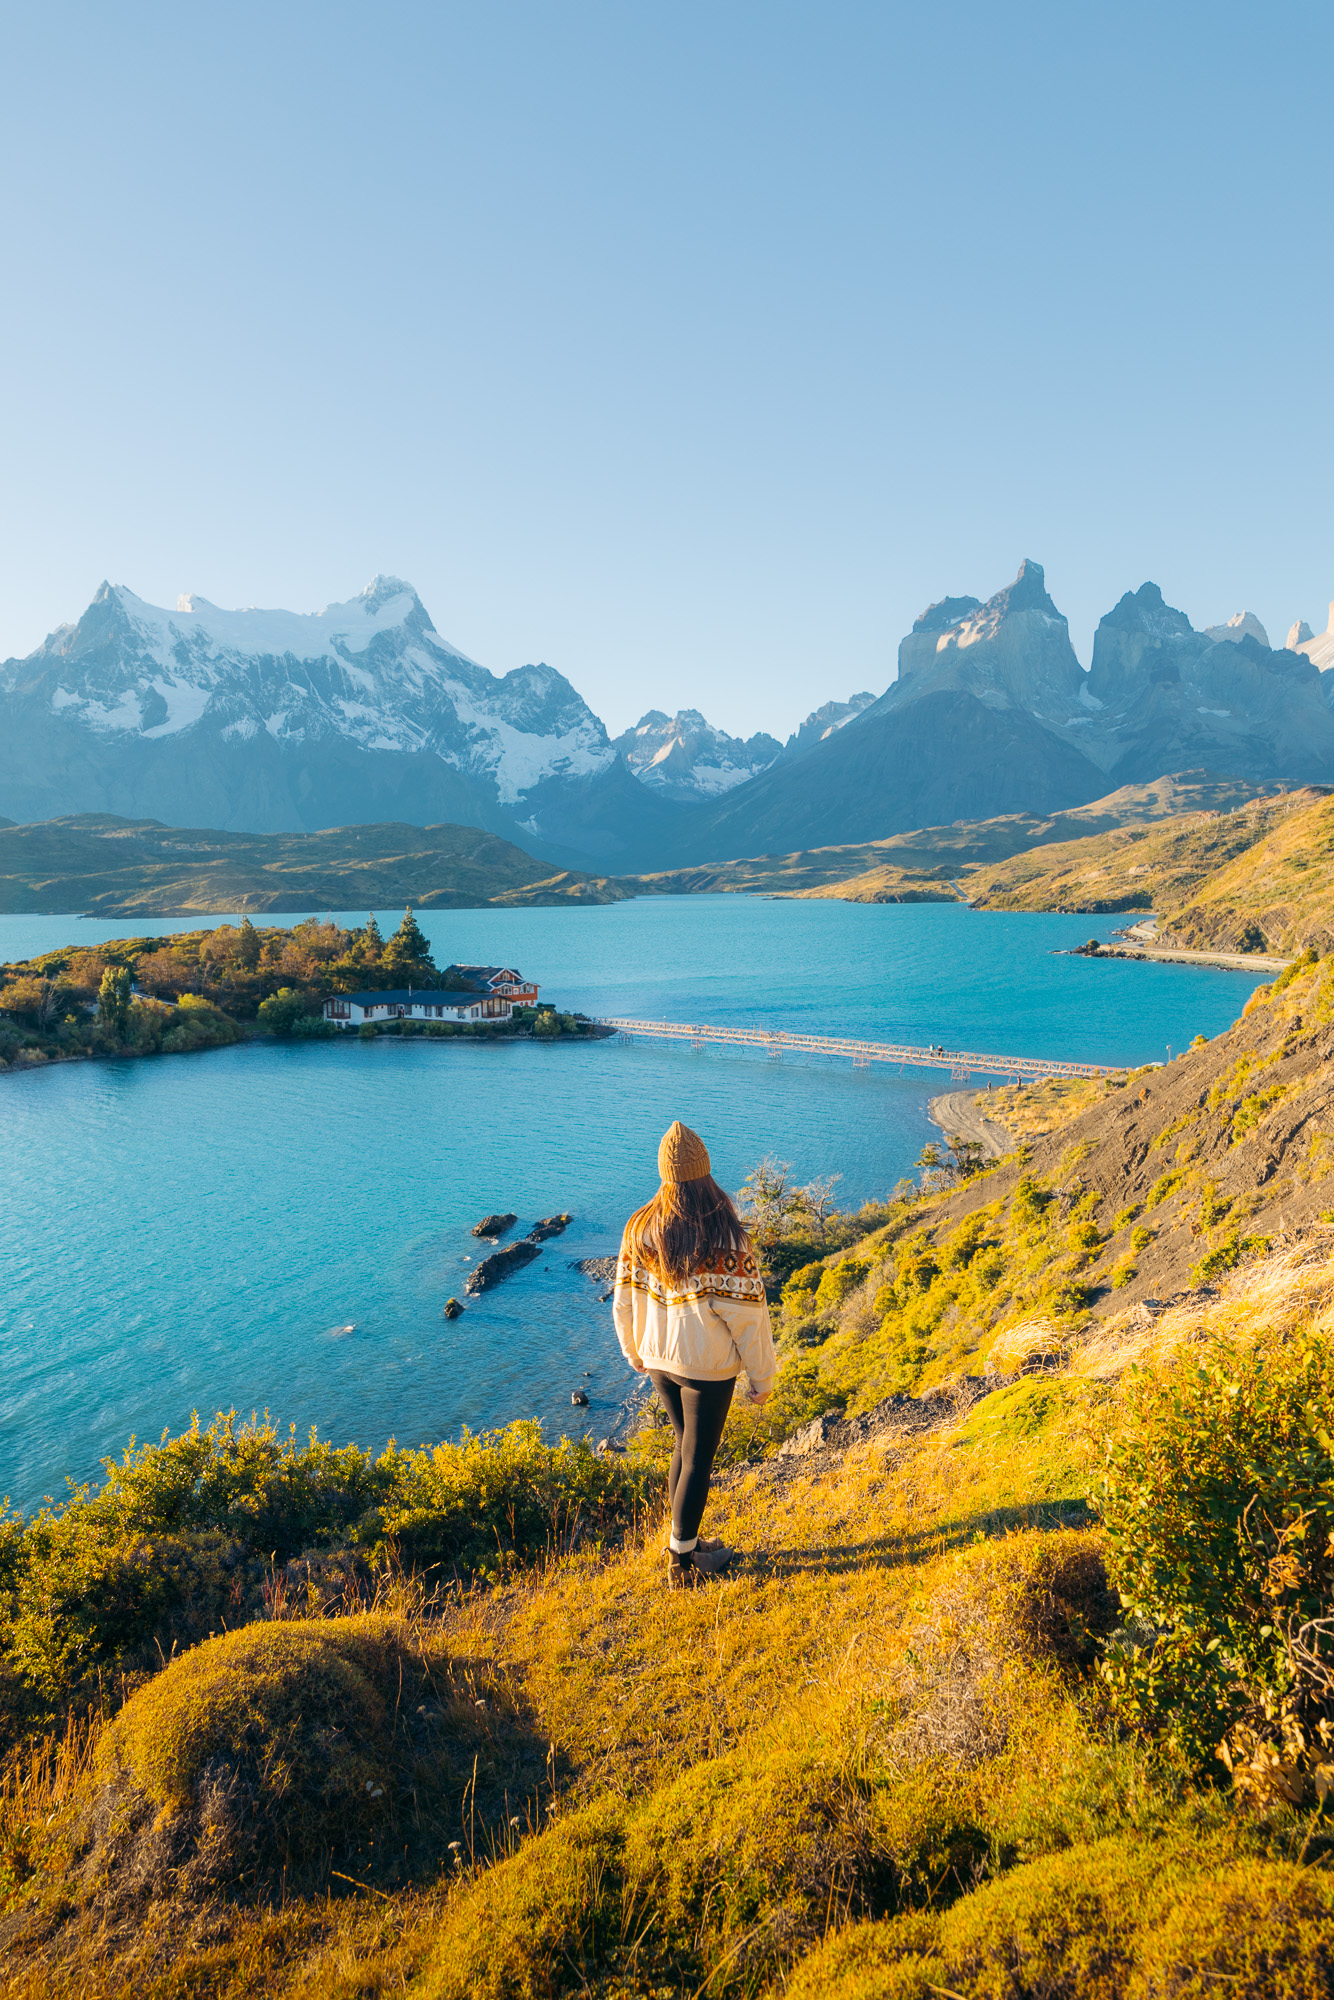
If location is your priority but you don’t want to spend luxury-lodge prices, Hostería Pehoé feels like a hidden gem. The hotel is built on a small island in Lake Pehoé, reached by walking across a wooden bridge over the turquoise water. Walk outside and you’re immediately surrounded by the lake and dramatic views toward the mountains, including Cerro Paine Grande.
The location was exactly why we chose to stay here. Lake Pehoé is one of the most beautiful areas of Torres del Paine, and staying directly on the water made it easy to get outside before sunrise, when we had our best chances of experiencing the lake completely still.
Our room itself was much more traditional than what we’d experienced at Tierra or EcoCamp. There weren’t any crazy modern luxuries, but it was clean, cozy and comfortable, with our own private bathroom and shower. The entire property had a warm, rustic atmosphere that felt less like checking into a luxury resort and more like arriving at a welcoming family-run lodge in an unbelievable location.
There’s also a restaurant and café on property. We loved grabbing morning lattes and pastries, while evenings meant warm soups, fresh bread and cozy Chilean dishes after a full day outside.
Another major perk is the location for exploring. The Condor Lookout South Trail is practically across the road. This relatively short, 1.6-mile round-trip hike offers sweeping views over the surrounding mountains and lakes. We were also close to the Explora boardwalk, which became my favorite sunrise location in Torres del Paine.
Would I stay here again? Absolutely. If you’re expecting five-star luxury, this probably isn’t the property for you. But if you want a comfortable room, a spectacular location, and the opportunity to save considerably compared with Torres del Paine’s luxury lodges, Hostería Pehoé is one I’d happily return to.
Best for: Travelers prioritizing location, photography and value over luxury amenities.
→ Check Hostería Pehoé rates & availability
Other Hotels to Consider in Torres del Paine
If Tierra Patagonia, EcoCamp, or Hostería Pehoé aren’t quite right for your budget or travel style, here are a few other properties worth considering:
Luxury
- Explora Patagonia: Iconic luxury hotel directly on Lake Pehoé with incredible views of the Paine Massif.
- Awasi Patagonia: Private villas and highly personalized experiences for an ultra-luxury stay.
Mid-Range
- Rio Serrano Hotel + Spa: Mountain views, spa, restaurant, and a convenient location near the park.
- Hotel Lago Grey: A great choice for exploring Grey Glacier and the western side of Torres del Paine.
More Affordable
- Hotel del Paine: A simpler, comfortable option in the Río Serrano area at a lower price point.
- Refugios & campsites: The best options for tighter budgets and multi-day trekkers. Book well ahead during summer.
The Experiences That Made This Trip Unforgettable
Beyond simply driving through Torres del Paine, a handful of experiences ended up defining our time in the park. From hiking beneath the famous granite towers to searching for wild pumas, these were the adventures that made our 9 days in Patagonia so memorable.
Hiking to Mirador Base Torres
If you’re visiting Torres del Paine for the first time, the hike to Mirador Base Torres is the one I would prioritize. It’s the park’s most iconic trail, and the only major hike we completed during our trip.
Distance: Approximately 13 miles / 21 km round trip
Elevation Gain: Approximately 3,500 ft / 1,070 m
Time: 7–10 hours
Difficulty: Hard
Trailhead: EcoCamp Patagonia for guests, or the Welcome Center parking lot
Guide Required?: During designated winter conditions/seasons; check current CONAF regulations
My Verdict: 5 stars — absolutely worth it
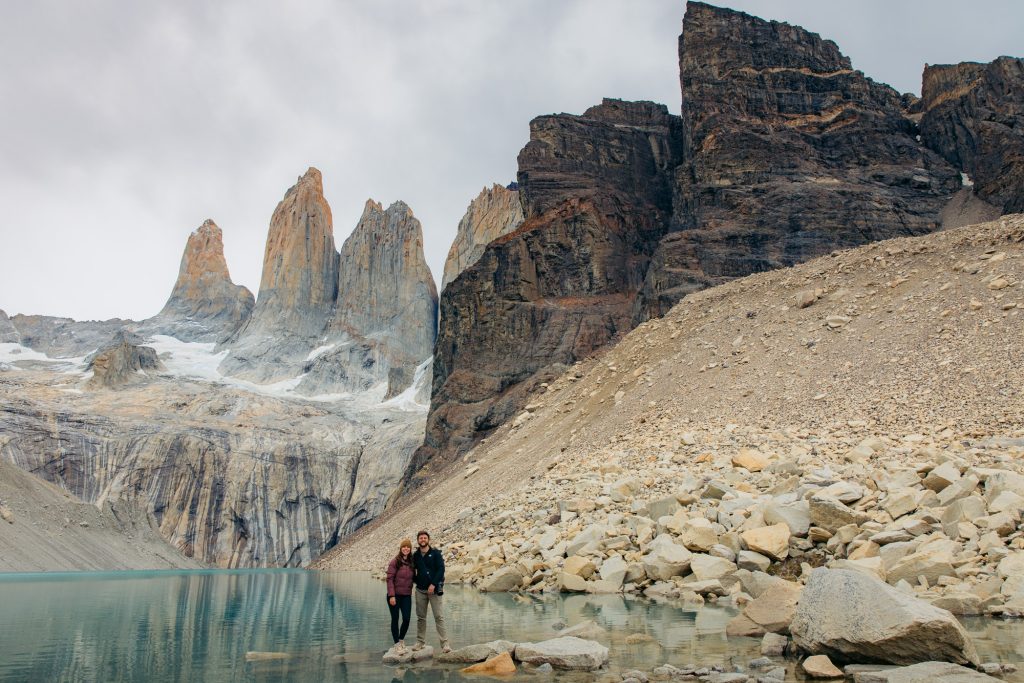
One of the biggest reasons we chose to stay at EcoCamp Patagonia was the ability to begin the hike to Mirador Base Torres directly from the property with one of their experienced guides. We left well before sunrise, hiking the first portion of the trail in the dark, and reached the lake by mid-morning. Another major perk of hiking through EcoCamp was having packed lunches prepared for us, which we carried to the viewpoint and ate with a pretty indescribable view in front of us.
The hike itself is challenging. I consider myself a hiker, but I also like taking my time on steep sections, and this trail has plenty of them. The first few miles gain elevation quickly, climbing roughly 1,400 feet before the trail mellows out for a stretch. From there, the climbing begins again, eventually leading into the rocky final approach toward Mirador Base Torres. Refugio Chileno sits along the route and makes a convenient place to stop, use the bathroom, purchase drinks or snacks, and take a break before continuing.
Reaching the top of that final rocky climb was one of my favorite moments of our entire Patagonia trip. As the terrain finally began to flatten and we walked toward the lake, Torre Sur, Torre Central, and Torre Norte suddenly felt impossibly close. You spend so much of a trip to Torres del Paine admiring these granite towers from viewpoints miles away, so standing directly beneath them after hours of hiking was incredibly humbling. Unless you’re a mountaineer or climber, this is about as up close and personal as most of us will ever get with the three towers, and the effort it takes to reach them makes the view that much more rewarding.
What I Recommend Bringing for the Base Torres Hike
Patagonia’s weather can change incredibly quickly, so layers are essential for this hike. I wore a merino wool base layer top and these bottoms, added a lightweight down jacket for warmth, and carried a waterproof rain shell in case the weather turned. I also hiked in my favorite KEEN hiking boots, which gave me the ankle support and stability I wanted during the steeper, rockier sections of the trail.
I would also strongly recommend trekking poles. They made a noticeable difference for me on the steep climbs and descents, especially toward the end of a long day when my legs were getting tired. Bring enough water to comfortably get you through the hike, along with food and snacks for the day. Refugio Chileno sits along the route and sells food and drinks and has bathroom facilities, but I wouldn’t rely on it for all of your supplies.
Do You Need a Guide for Mirador Base Torres?
During the summer season, we chose to hike Mirador Base Torres with an EcoCamp guide, and I would absolutely recommend the experience if it fits your budget. Having someone who knew the trail meant we could focus entirely on the hike, while also learning about the landscape, wildlife, and history of Torres del Paine along the way.
If you’re an experienced, confident hiker, the trail itself is very doable without a guide when independent hiking is permitted. Either way, prepare for a full day on the trail. Depending on your hiking speed, how often you stop, and how long you spend at the viewpoint, the experience can easily stretch beyond 10 hours.
If you’d prefer to hike with a guide, you can browse guided Mirador Base Torres hikes through GetYourGuide here. Use my code HEYMEAGAN5 for 5% off your booking.
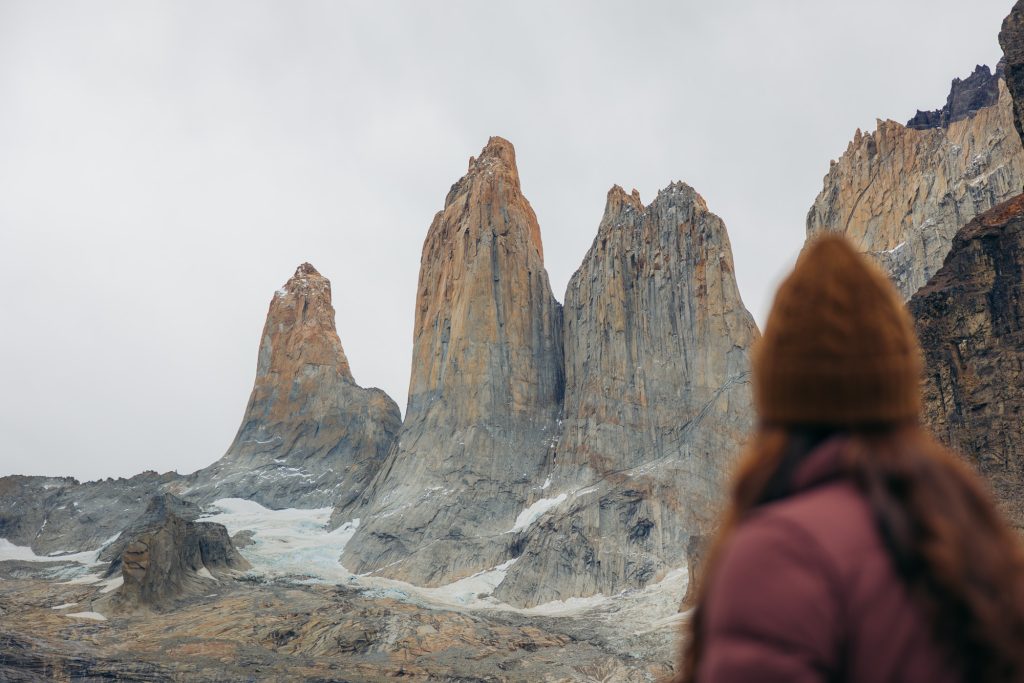
Would I hike it again? Without question. If I could give someone planning Mirador Base Torres three pieces of advice, they would be: start early, prepare for rapidly changing weather, and don’t underestimate the final climb. It’s a long day, but for me, standing beneath those three granite towers was worth every step.
Puma Viewing in Torres del Paine
Torres del Paine is one of the best places in the world to see wild pumas, and spotting one had been at the very top of my wish list for Patagonia. Incredibly, we ended up getting lucky on our own.
We spent several early mornings driving through the park around sunrise, scanning the open landscapes for wildlife, and one morning we spotted a puma moving through the distance. Wildlife sightings are never guaranteed, which made getting to watch one in the wild feel even more special.
If seeing a puma is a priority for your trip, I would recommend booking a dedicated puma-tracking experience with a knowledgeable local guide. Guides understand the animals’ behavior, know what to look for across the landscape, and can give you a much better chance of finding one while viewing wildlife responsibly.
Several hotels in and around Torres del Paine offer guided puma-tracking experiences, including Tierra Patagonia and EcoCamp Patagonia, which makes it easy to arrange one as part of your stay. You can also browse puma tracking and wildlife tours in Torres del Paine through GetYourGuide (code HEYMEAGAN5 for 5% off).
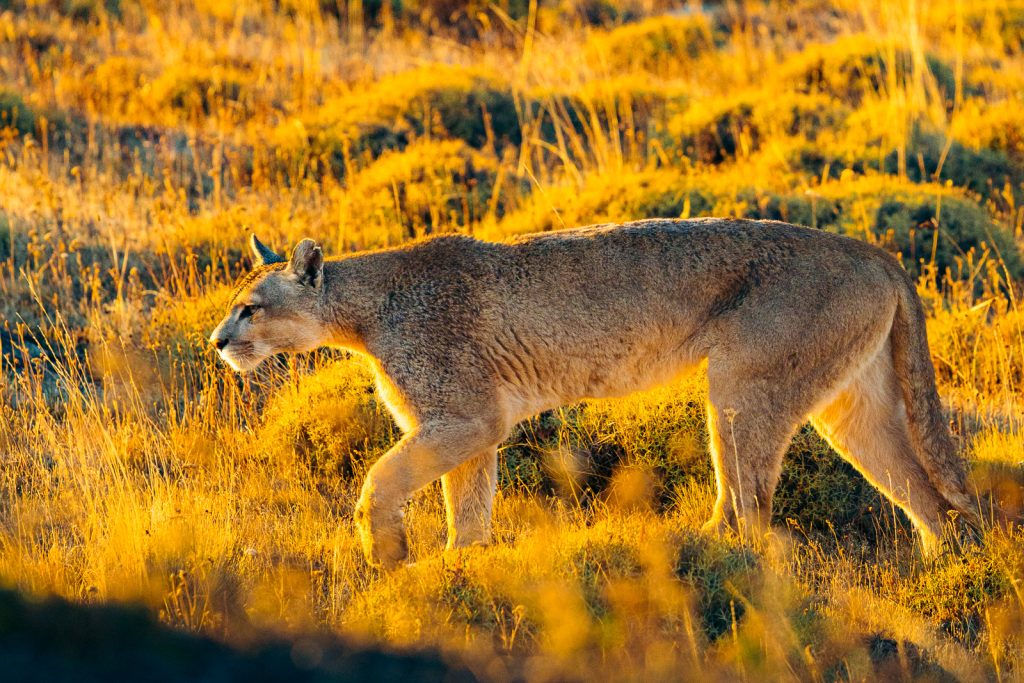
Would I prioritize it? Absolutely. Seeing a wild puma against the landscapes of Patagonia was one of my favorite wildlife encounters of the entire trip.
Horseback Riding in Torres del Paine
If you love horses, horseback riding in Torres del Paine is an experience I would absolutely make room for in your itinerary. We rode twice during our trip, and the two experiences were completely different.
Our first ride was arranged through Tierra Patagonia and took us into the landscapes surrounding Laguna Azul, where we climbed into the hills for closer views of the Paine Massif. The roughly hour-long ride was led by local gauchos, and afterward we were able to help unsaddle and release the horses before enjoying snacks and drinks. Tierra offers several horseback experiences throughout the region, making this an especially easy activity to incorporate if you’re staying at the hotel.
Our second ride, with Cimarrón, was the experience I would especially recommend to fellow equestrians. We booked a private three-hour ride from the Río Serrano area for roughly $200 per person at the time of our trip. The trail began beneath towering green trees before climbing through the forest and eventually opening into enormous views across the Río Serrano Valley and toward the Paine Massif.
What I loved most was that the Cimarrón didn’t feel like a typical nose-to-tail tourist trail ride, which is typically hard to find in many places for tourists. Cimarrón caters to different riding abilities, so beginners can absolutely have a slower, more controlled experience, while confident riders can arrange something more adventurous. On our ride, that meant walking technical sections, trotting through open pastures, crossing water, and galloping across the plains toward the river. Their current offerings range from shorter scenic rides to full-day and multi-day expeditions through Patagonia.
For photography, I once again brought my Canon RF24-105mm F2.8, and this is exactly the type of experience where I love having the additional reach beyond 70mm. At 105mm, you can compress the Paine Massif behind a horse and rider, while the f/2.8 aperture is equally useful for more intimate details—the horses, saddles, gaucho boots, and little moments along the trail. Once my B&H affiliate account is approved, I’ll link the exact lens here.
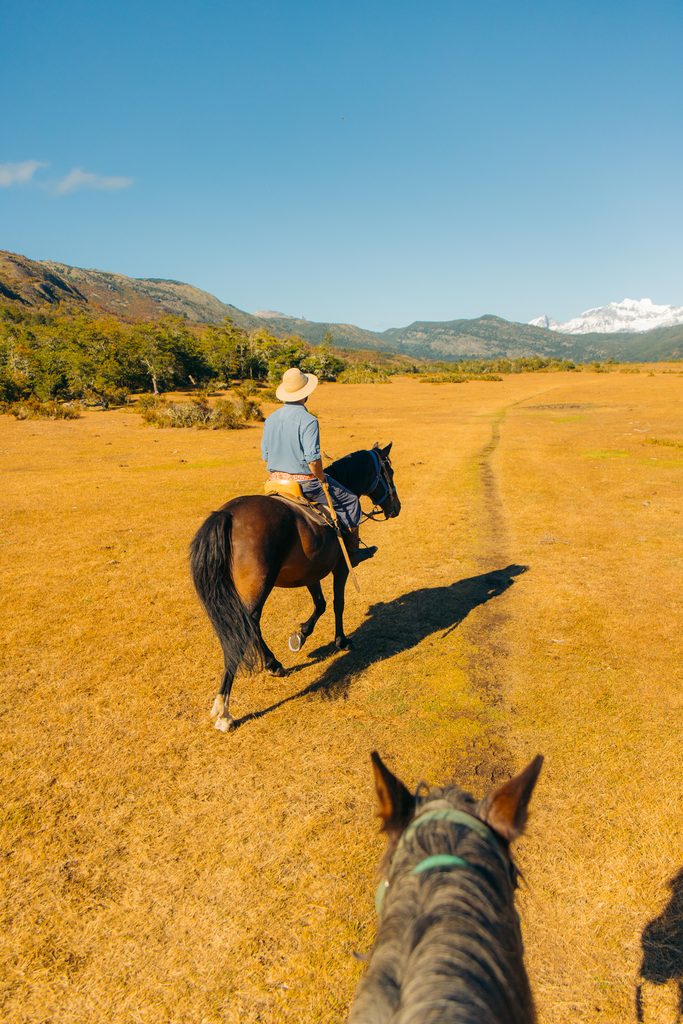
Cimarrón Tours
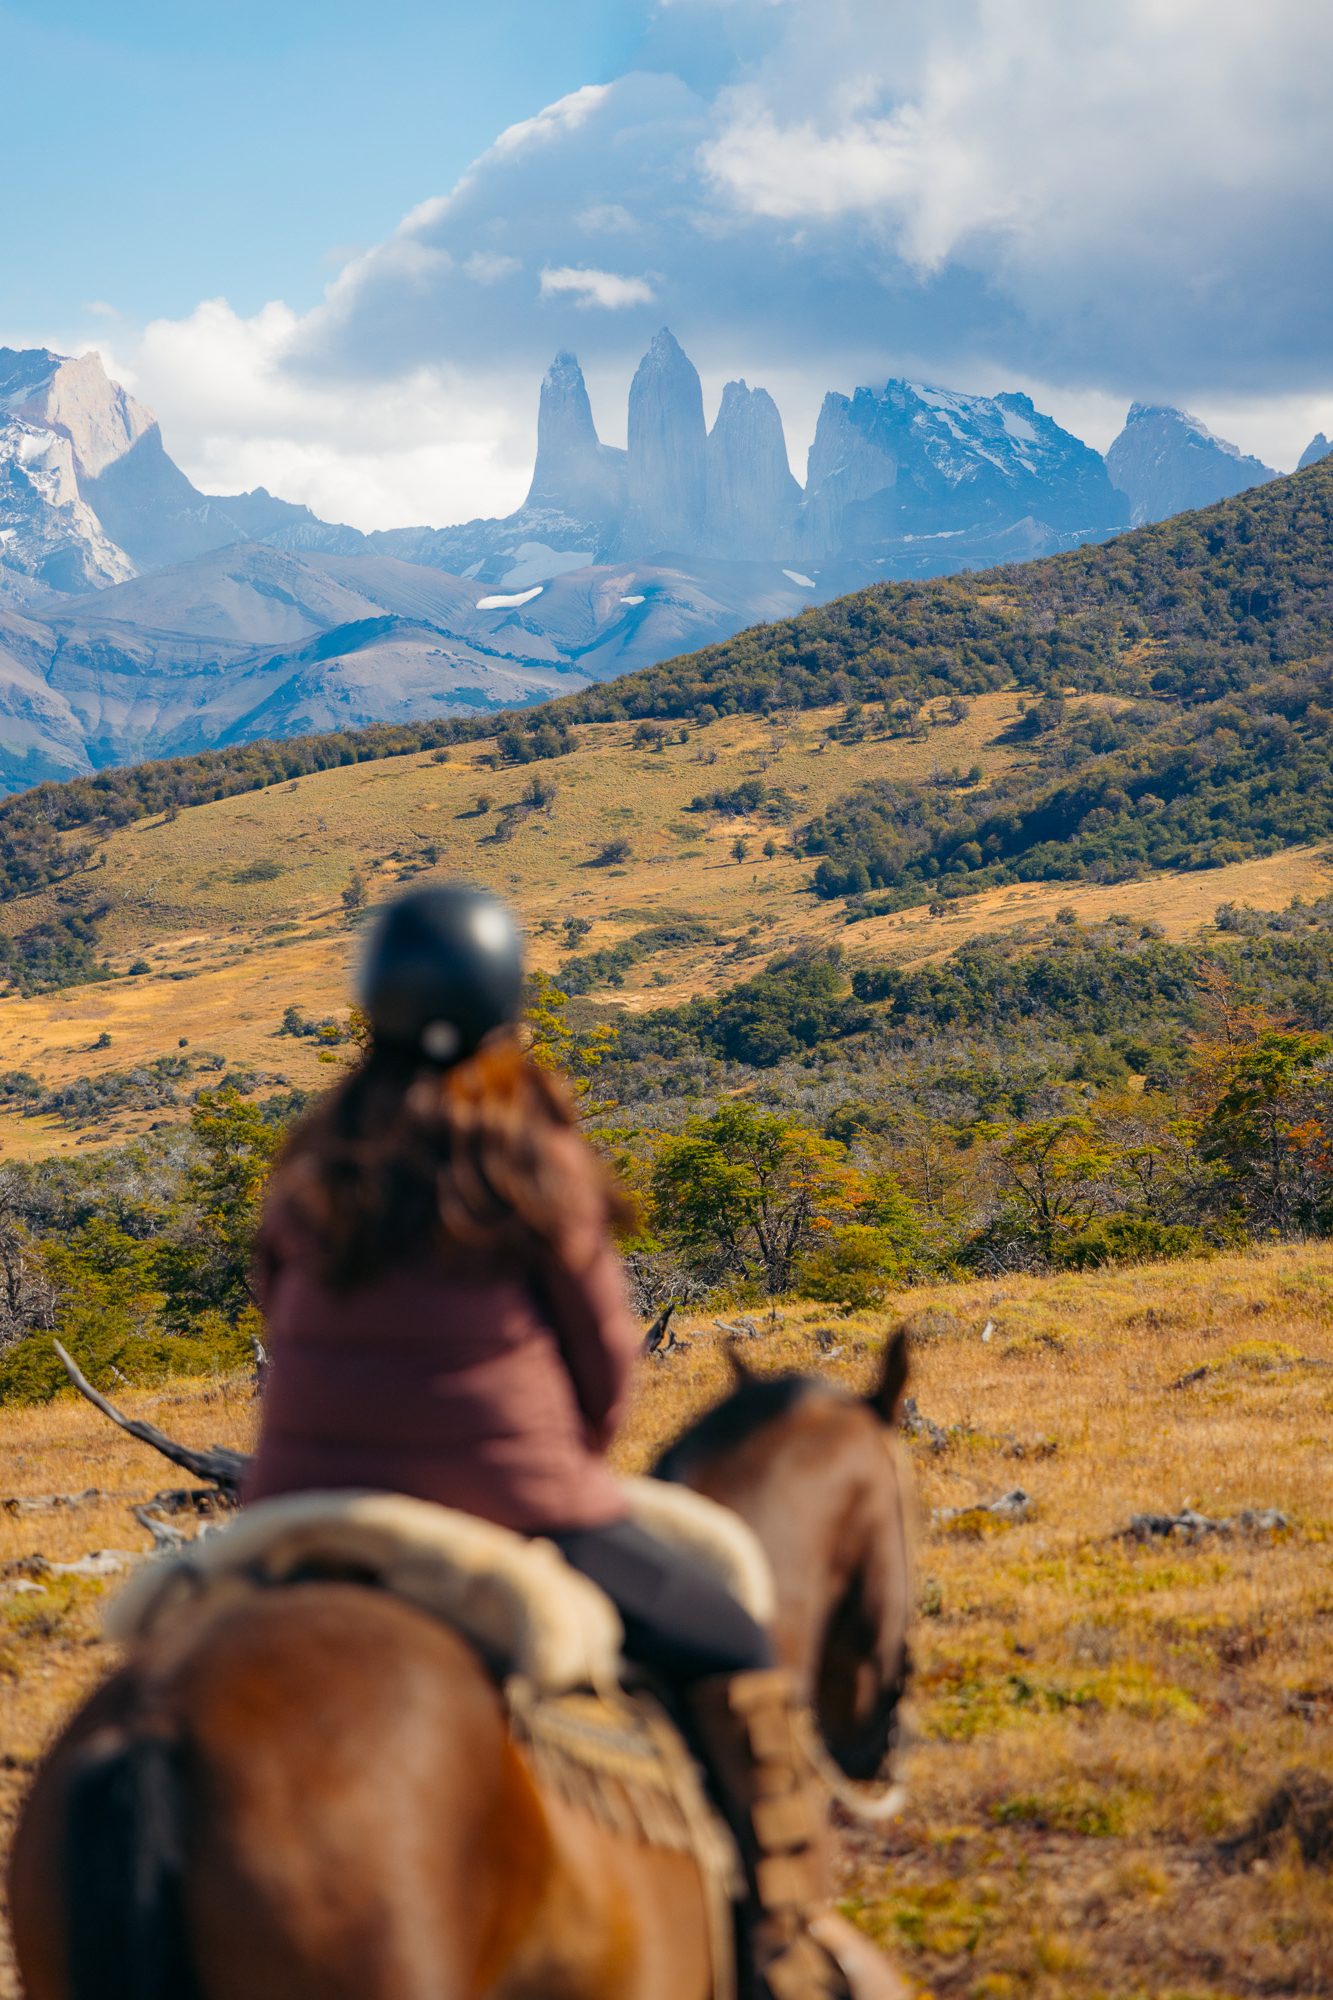
Tierra Patagonia
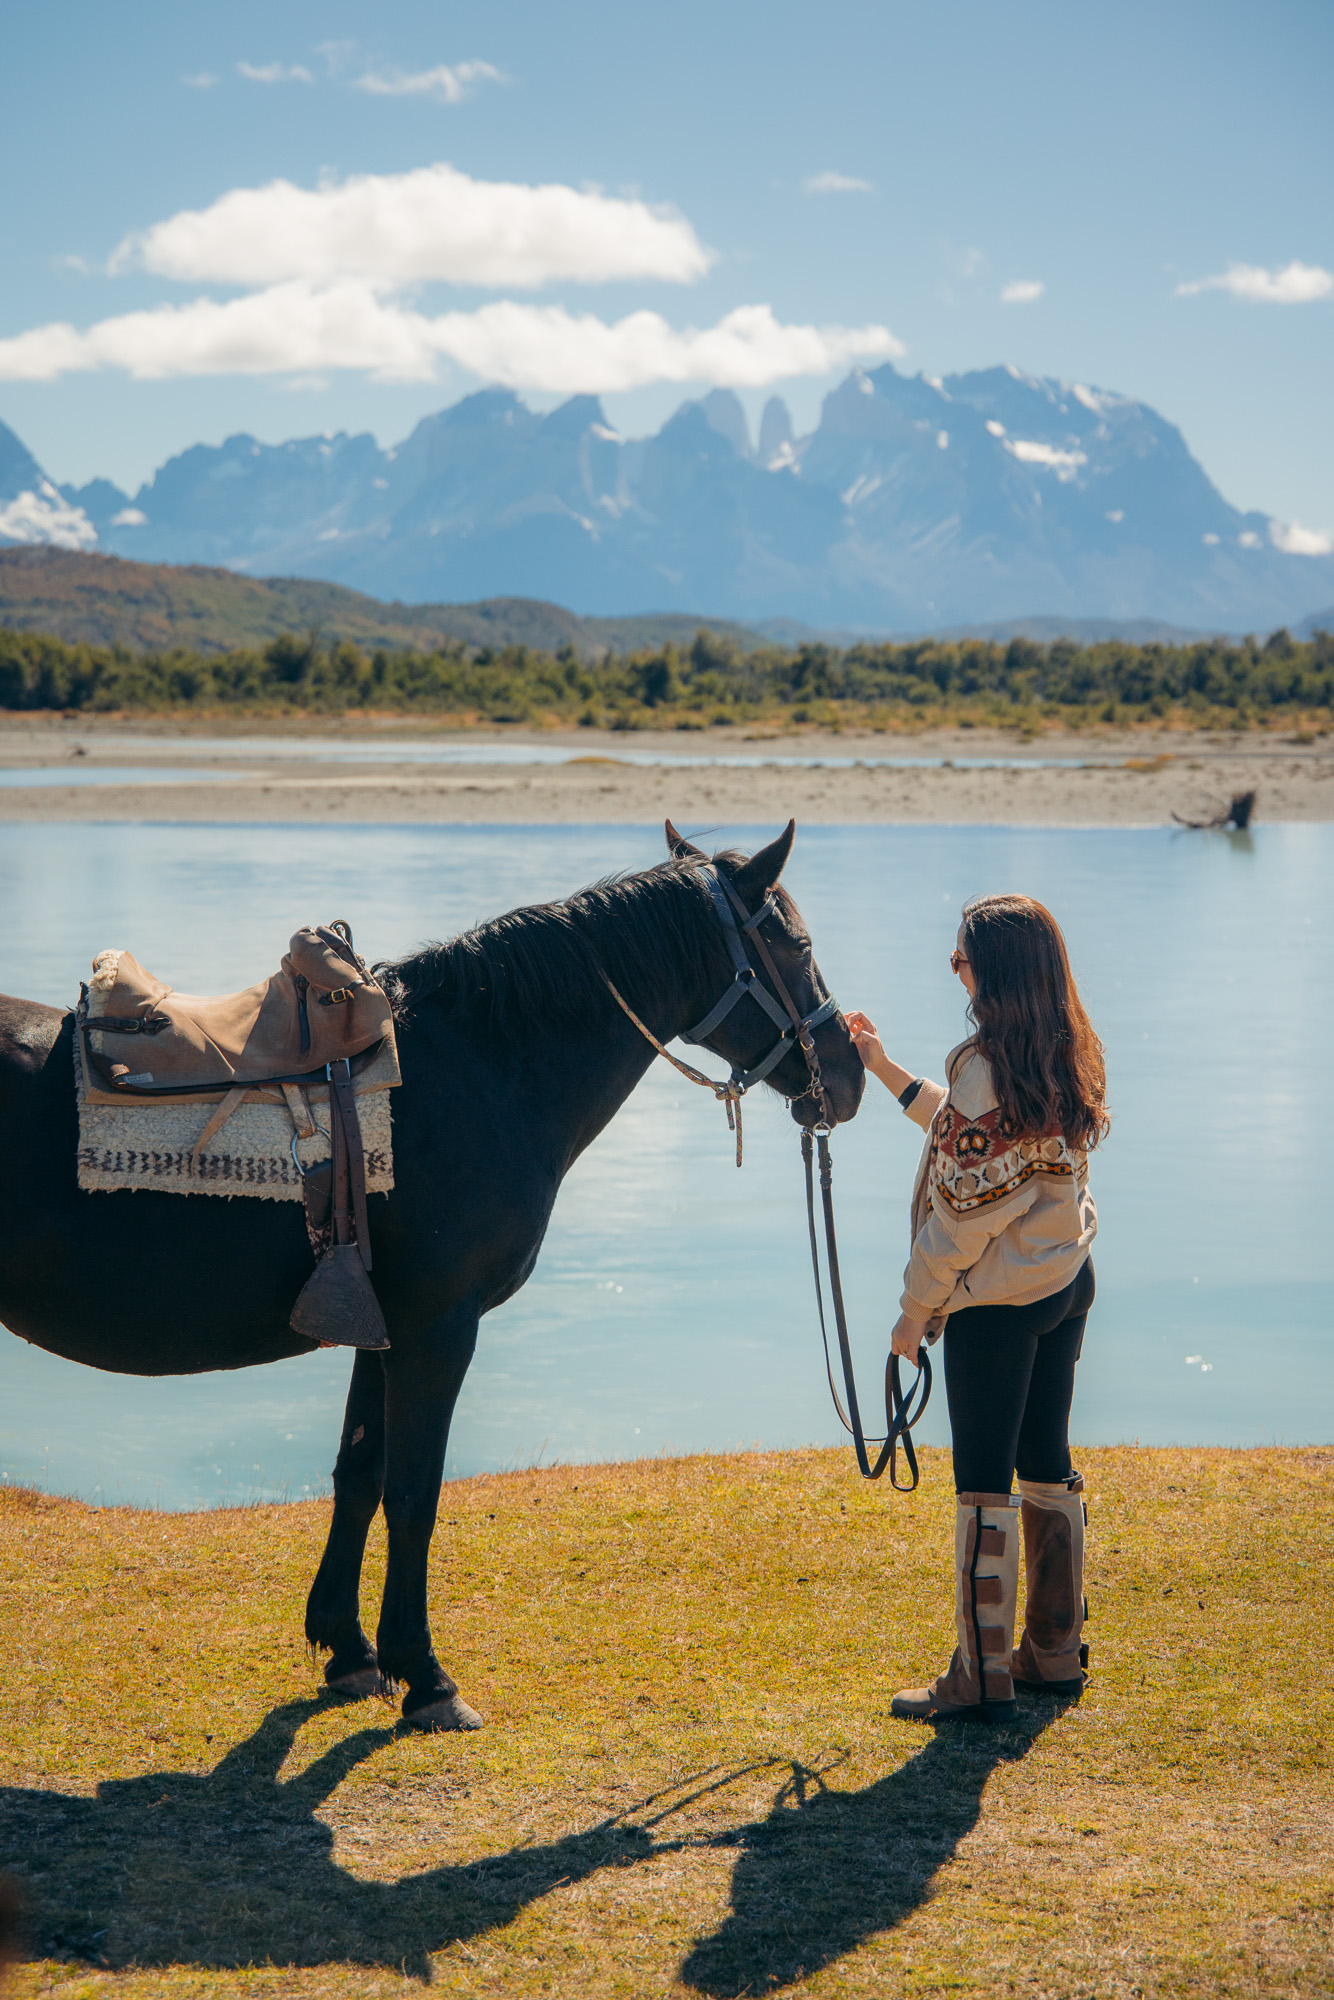
Cimarrón Tours
I would book horseback riding here again without hesitation. In fact, next time I’d seriously consider one of Cimarrón’s multi-day rides. There’s something completely different about experiencing Patagonia from horseback, and as someone who loves riding, this was about as close as I’ve ever felt to living out a real-life Lord of the Rings adventure.
Booking tip: We reserved our Tierra Patagonia ride around two months in advance but got lucky with a last-minute opening at Cimarrón. During Patagonia’s high season, I would contact your preferred outfitter several months ahead, especially if you’re an experienced rider hoping for a private or more adventurous itinerary.
Photography tip: Before or after a Cimarrón ride, stop at Mirador Río Serrano for a beautiful elevated view over the winding turquoise river and surrounding mountains.
Grey Glacier Boat Excursion
One of my favorite ways to experience the western side of Torres del Paine was taking the Grey III boat across Grey Lake to Grey Glacier. The roughly three-hour excursion begins with a beautiful walk through the forest and along Grey Beach before boarding the boat directly from the sand. From there, you can move between the indoor cabin and outdoor decks as the boat travels across the lake toward the enormous blue faces of Grey Glacier.
We booked the excursion through Tierra Patagonia for approximately $250 per person, which included round-trip transportation from the hotel, a Tierra guide who accompanied us throughout the experience, and a packed lunch with sandwiches, snacks, and drinks. You can also book the Grey III navigation independently for roughly $120 per person, depending on the season and current pricing. The standard boat experience may include a welcome drink, with additional food and beverages available for purchase onboard. If you’re driving yourself, this is an easy way to experience Grey Glacier for considerably less. The excursion departs from the Hotel Lago Grey area, making Hotel Lago Grey an especially convenient place to stay if this experience is high on your list.
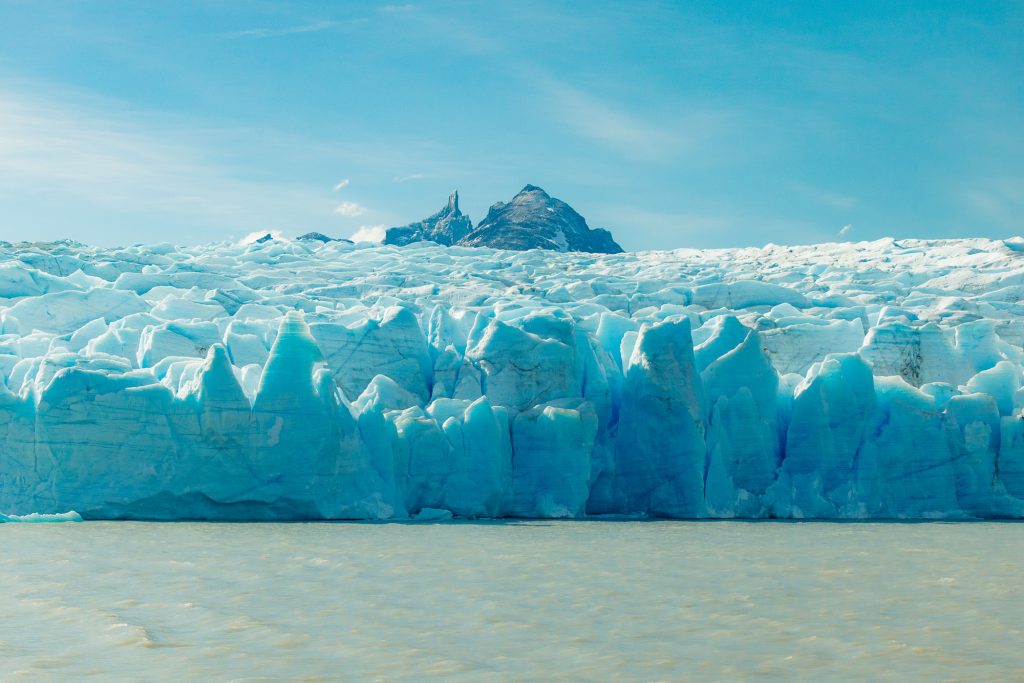
For photographers, this excursion was absolutely worth it. I brought my Canon RF24-105mm F2.8 for wider landscapes and lifestyle images and my RF100-500mm F4.5-7.1 for compressed shots of the glacier. Having both focal ranges let me capture the enormous scale of the landscape while still isolating the incredible textures and details in the ice.
Would I do it again? Absolutely. If you don’t have time to hike toward Grey Glacier, the boat is an incredible way to experience it from the water and get remarkably close to the glacier itself.
Should You Rent a Car in Torres del Paine?
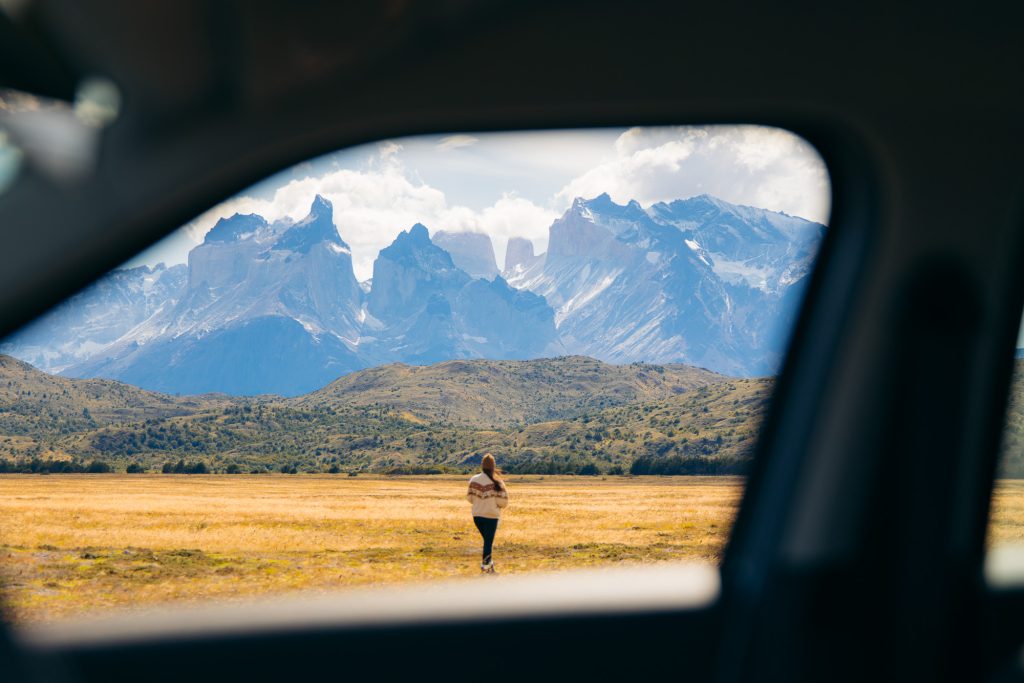
For us, renting a car was one of the best decisions we made while planning our trip to Torres del Paine. Having our own vehicle gave us the freedom to explore the park at our own pace, pull over when we spotted wildlife, chase changing light for photography, and completely rearrange our plans when Patagonia’s famously unpredictable weather had other ideas.
There are absolutely ways to experience Torres del Paine without renting a car, including hotel transfers, buses, private drivers, and organized tours. But if you’re comfortable driving internationally and want the flexibility to explore independently, I would rent a car again without hesitation.
CONAF describes Puerto Natales as a primary gateway and identifies the Río Don Guillermo crossing at Villa Cerro Castillo as an important access route from Argentina. For current park conditions, entrance information, and official visitor updates, check the official Torres del Paine National Park page from CONAF before your trip.
Why I Recommend Renting a Car for Torres del Paine
The biggest advantage of renting a car in Torres del Paine was the freedom to change our plans at a moment’s notice. Patagonia’s landscapes can look completely different from one hour to the next, and having our own vehicle meant we could pull over whenever the light changed across the granite peaks, stop when we spotted wildlife, or completely change direction when the weather had other plans.
We often left our hotel before sunrise and drove slowly through the park scanning the hillsides for wildlife. We stopped for everything from harrier hawks and great horned owls to seemingly endless herds of guanacos—and even managed to spot a puma on our own one morning. While I would still recommend booking a dedicated puma-tracking experience if seeing one is important to you, having our own car gave us the freedom to spend extra time searching independently.
One of my favorite examples happened on a morning when we left Tierra Patagonia before sunrise planning to spend the morning searching for wildlife. As the sky began to brighten, we realized the weather was unusually clear. Instead of continuing with our original plan, we immediately changed course and drove roughly an hour to the Explora Hotel Boardwalk, arriving in time for what became one of the most beautiful sunrises of our entire trip. Had we been committed to a scheduled 6 a.m. tour or predetermined route, we simply wouldn’t have had that flexibility.
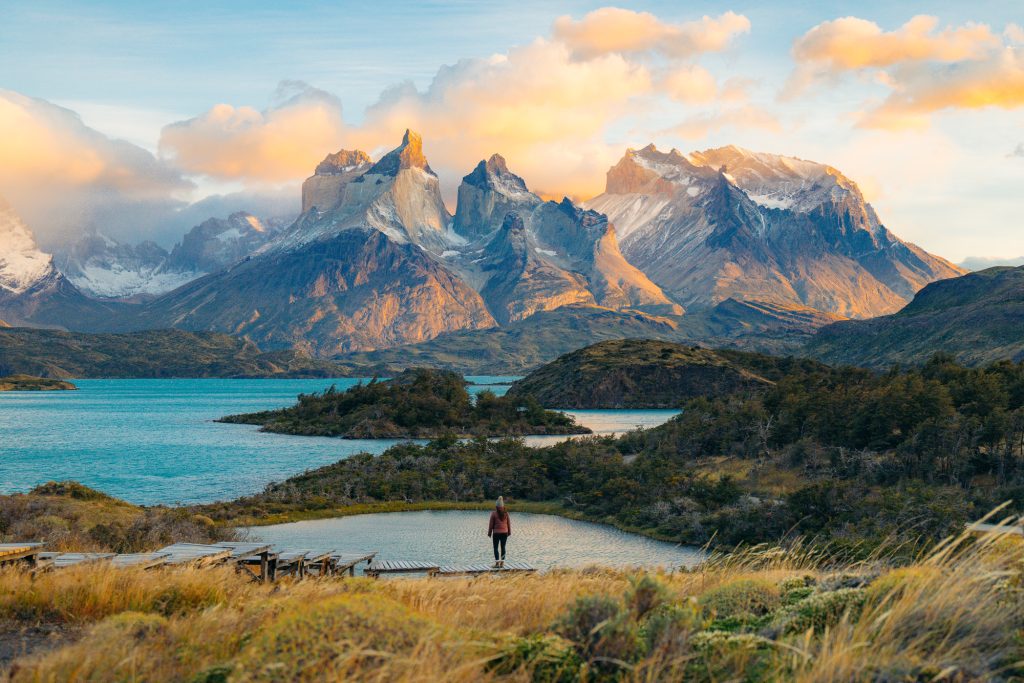
Sunrise at Explora Hotel Boardwalk
A rental car also made moving between accommodations incredibly easy. Torres del Paine is much more spread out than I anticipated, and Tierra Patagonia, Hotel Lago Pehoé, and EcoCamp Patagonia were each roughly 45–60 minutes apart during our route. Rather than coordinating transfers every time we changed hotels, we packed the car and continued exploring along the way.
That said, you absolutely do not need to rent a car to experience Torres del Paine. Hotel transfers, buses, private drivers, and organized excursions make it entirely possible to visit without driving yourself. The tradeoff is flexibility. If you’re comfortable driving internationally and value spontaneous photography stops, independent wildlife searching, sunrise missions, and the ability to pivot around Patagonia’s unpredictable weather, having your own vehicle is difficult to beat.
Renting a Car in El Calafate
We picked up our rental car directly from El Calafate Airport (FTE) before beginning our drive toward Torres del Paine. As I mentioned earlier, one thing that genuinely surprised me was how limited the selection of automatic vehicles was. If you don’t drive manual, I would reserve an automatic as early as possible rather than assuming one will be available when you arrive.
Before booking, also confirm that your rental company allows the vehicle to cross from Argentina into Chile and can provide the necessary cross-border documentation. I’ll cover exactly what this process looked like for us at the border below.
→ Compare rental cars at El Calafate Airport
Driving From El Calafate to Torres del Paine
Because we began our trip in El Calafate, Argentina, reaching Torres del Paine meant driving across the Argentina–Chile border before continuing to our first hotel, Tierra Patagonia. Our drive took roughly four hours, including a relatively quick border crossing, but I would give yourself additional time in case you encounter delays at immigration.
We had actually landed in El Calafate from Buenos Aires around 5 p.m. the evening before. Because the Río Don Guillermo border crossing isn’t open 24 hours, we spent the night in El Calafate, stocked up on groceries, and left before sunrise the following morning so we could reach the border around opening time.
Important: Río Don Guillermo is currently open from 8:00 a.m. to 8:00 p.m., according to the Argentine government. Hours can change due to weather, seasonal conditions, or other circumstances, so check the official Río Don Guillermo border-crossing page shortly before your drive.
Our route took us through Esperanza, about 98 miles (158 km) from El Calafate. We made a point to stop here for gas before continuing toward Chile, and I would recommend taking advantage of opportunities to fill your tank whenever you find them in this part of Patagonia. From Esperanza, we had roughly another 98 miles (157 km) and two hours of driving before reaching Tierra Patagonia.
Here is a link to the direct route we took via Google Maps.
Before leaving El Calafate, we also stopped at a grocery store and stocked up on water, snacks, and sandwich ingredients for the drive. This stretch of Patagonia is incredibly remote, with long expanses of open landscape and very few places to stop. Esperanza gave us a chance to use the bathroom and fill the tank around halfway through our drive, but otherwise, don’t expect the roadside amenities you might be accustomed to on a road trip in the United States.
The roads on our route were mostly paved, with some light dirt sections, and our small 2WD rental car handled them without any problems. The scenery was largely made up of enormous open Patagonian landscapes rather than dramatic mountain views, but spotting our first guanacos along the way made it immediately feel like the adventure had begun.
Cell service became increasingly unreliable as we drove farther into Patagonia, so I strongly recommend downloading your Google Maps route for offline use before leaving El Calafate. Wi-Fi was also difficult to find outside of our hotels once we reached Torres del Paine.
Crossing the Argentina–Chile Border With a Rental Car
Driving a rental car from Argentina into Chile requires a little more preparation than a typical road trip, but our actual border-crossing experience was surprisingly straightforward. The most important thing is to tell your rental-car company in advance that you plan to drive the vehicle into Chile so they can confirm the vehicle is permitted to cross the border and provide the necessary documentation.
We first stopped at the Argentine Río Don Guillermo border checkpoint, where we parked the car and went inside to complete the process of exiting Argentina. We brought our passports and all of the paperwork provided by our rental-car company with us. From there, we got back in the car and continued approximately 5 miles (8 km) to the Chilean border at Control Fronterizo Cerro Castillo, where we parked and went inside again to officially enter Chile.
The exact documents required for your vehicle can vary depending on the rental company, so I would confirm the requirements directly with them before your trip. In general, travelers driving a rental vehicle across this specific border should expect to need their passport, vehicle documentation, authorization from the rental company to take the vehicle across the border, and proof of appropriate international insurance. Depending on your rental company, you may also be asked to carry an International Driving Permit. We obtained ours through AAA before leaving the United States, which was a quick and easy process. Argentina’s official border guidance also notes vehicle registration, authorization when the driver is not the owner, and international insurance among the relevant documentation for vehicles crossing its borders.
Our rental company did not charge us an additional fee to take the car into Chile, but this varies by company. When comparing rental cars, I would specifically ask about cross-border fees, required paperwork, insurance coverage, and how far in advance they need to prepare the documents.
Bringing Food From Argentina Into Chile
This is another important one to know before arriving at the border. Chile has strict rules surrounding agricultural and animal products entering the country, and travelers are required to declare applicable products when entering. Don’t assume that something is allowed simply because it’s packaged or because you purchased it at a grocery store in Argentina.
At the Chilean checkpoint, our vehicle was inspected for food coming from Argentina. We had stocked up in El Calafate for the drive and simply threw away the few snacks we still had remaining before continuing into Chile. Chile’s Agricultural and Livestock Service (SAG) determines what plant and animal products can enter the country, so when in doubt, declare what you’re carrying and let the border officials determine whether it can enter.
Thankfully, there was a small café and gift shop shortly after we crossed into Chile, where we were able to grab a few more snacks before continuing toward Tierra Patagonia.
Our entire border process took only about 30 minutes, but we intentionally arrived around the 8 a.m. opening time and encountered virtually no wait. I would not plan your driving schedule around a 30-minute crossing. Wait times can vary considerably, so leave yourself plenty of extra time, especially if you have a hotel check-in, excursion, or other reservation later that day.
Where to Get Gas Before Torres del Paine
If you’re planning to drive yourself around Torres del Paine, fuel is one logistical detail you absolutely need to think about before entering the park. There are no public gas stations inside Torres del Paine National Park, and according to CONAF, the nearest service station is in Puerto Natales, and they advise reserving at least ¼ of your tank to successfully reach Puerto Natales.
Because we were driving into Chile from El Calafate, we filled our tank in Esperanza, Argentina, before continuing toward the border. We also intentionally rented a small, fuel-efficient vehicle knowing that gas would be difficult to find once we reached Torres del Paine.
For our 9-day trip, our original plan was to monitor our fuel carefully and make the roughly two-hour drive to Puerto Natales if we needed to fill up again. Depending on where you’re staying within Torres del Paine, this can turn refueling into a significant detour, so I would enter the park with as full a tank as possible and pay attention to your remaining range throughout the trip.
We ended up getting incredibly lucky. Halfway through our stay, we asked one of our hotels if there was any way to purchase a small amount of gasoline from them at a premium, and they agreed. I would not build your fuel plan around this. Some hotels and accommodations in the Torres del Paine area may keep fuel on hand for their own operations or occasionally help guests in a pinch, but availability isn’t guaranteed and these are not public gas stations.
→ My advice: Fill your tank whenever you have a reliable opportunity before entering Torres del Paine, choose a fuel-efficient rental car if possible, and plan your driving mileage with enough fuel remaining to reach Puerto Natales if necessary.
What Are the Roads Like in Torres del Paine? Do You Need a 4×4?
One thing I worried about before our trip was what the roads inside Torres del Paine would actually be like, and whether we would regret renting such a small car. In our experience, we didn’t need a 4×4 at all.
Many of the roads we drove throughout the park were unpaved, but they were well-maintained dirt and gravel roads that our small 2WD rental car handled without any issues. We didn’t encounter anything particularly technical or intimidating, and road conditions never made us wish we had rented a larger SUV.
In fact, I’d choose a small, fuel-efficient car again. Gas is difficult to find around Torres del Paine, so for us, the better fuel economy ended up being more valuable than having a larger 4WD vehicle.
You should still drive carefully on gravel, watch for changing road conditions and wildlife, and check current conditions before your trip, particularly after severe weather. But for the roads we encountered during our late-February visit, a standard 2WD vehicle was completely sufficient.
Cell Service, Google Maps & Navigation
📍 Planning your route? I’ve saved every stop from our 9-day trip into one Google Maps list so you can easily reference it while planning.
→ Save my Torres del Paine Google Maps list here.
Cell service throughout Torres del Paine was extremely limited and often nonexistent during our trip. Wi-Fi was generally available at the hotels we stayed at, but once we were out exploring the park, we rarely had a reliable connection.
Before entering Torres del Paine, I strongly recommend downloading the entire area in Google Maps for offline use and saving any important locations you plan to visit ahead of time.
I would also download anything else you might need offline, including hotel confirmations, park tickets, rental-car documents, and your itinerary. We took screenshots of important information as an additional backup rather than assuming we’d be able to pull up an email when we needed it.
If you want an additional way to communicate while traveling through remote areas without cell service, a satellite communicator like the Garmin inReach can also provide extra peace of mind.
Would I Rent a Car in Torres del Paine Again?
Absolutely. Renting a car was one of the best decisions we made for our trip to Torres del Paine. The freedom to chase sunrise, stop for wildlife, move easily between hotels, and completely change our plans around the weather made having our own vehicle worth it.
If you’re comfortable driving internationally and want to explore Torres del Paine independently, I would rent a car again without hesitation. If you’d rather not deal with border crossings, remote roads, or planning your own transportation, you can absolutely experience the park through hotel transfers and guided excursions instead.
Budget: How Much Does a 9-Day Torres del Paine Trip Cost?
Torres del Paine can be an expensive destination, but how much you spend depends heavily on where you stay and how you choose to explore the park. Luxury all-inclusive lodges can push the cost of a trip significantly higher, while self-driving, staying at simpler hotels, and choosing your excursions carefully can bring the total down considerably.
Our 8-night trip was a mix of both. We spent four nights at Tierra Patagonia, two nights at EcoCamp Patagonia, and two nights at Hostería Pehoé, giving us a combination of luxury, glamping, and more affordable accommodations.
Flights
International airfare is not included in the total budget below because prices vary dramatically depending on where you’re traveling from. Once in South America, however, you’ll also need to account for your flight into Patagonia.
For reference, round-trip flights between Buenos Aires and El Calafate can often be found for roughly $200–$350 per person, depending on the airline, baggage, travel dates, and how far in advance you book.
Hotels
Accommodation will likely be the largest variable in your Torres del Paine budget. Luxury properties can easily cost well over $1,000 per night during peak season, while simpler hotels, refugios, and campsites can bring the cost down considerably.
Keep in mind that some of the more expensive properties also include meals, drinks, transportation, and guided excursions, so the nightly rate isn’t always directly comparable to a traditional hotel.
For our trip, we stayed:
- 4 nights at Tierra Patagonia — expect roughly $1,000–$2,000+ per night for two guests, depending on season, room, and package.
- 2 nights at EcoCamp Patagonia — roughly $400–$1,000+ per night for two guests, depending heavily on the dome and package you choose.
- 2 nights at Hostería Pehoé — roughly $200–$400 per night for two guests during the summer season.
These are planning ranges rather than fixed rates. Patagonia pricing can vary dramatically depending on your travel dates, room category, package inclusions, and availability.
Rental Car + Gas
For an 8–9 day rental from El Calafate, I would budget approximately $500–$900 for a small rental car, with automatic vehicles potentially costing more and becoming harder to find during peak summer.
If you’re renting in Argentina and driving into Chile, make sure your rental company permits international travel and ask whether the necessary cross-border paperwork and insurance are included or charged separately.
I’d budget another $100–$200 for fuel, depending on how extensively you plan to drive throughout the park. We intentionally chose a small, fuel-efficient 2WD vehicle, which handled the roads we encountered without any problems and helped considerably with fuel consumption.
For two travelers splitting the cost, that works out to roughly $300–$550 per person for the rental car and fuel, before any additional fees.
Food & Groceries
Your food budget will depend heavily on where you stay. Our meals were included at Tierra Patagonia and through our Full Board stay at EcoCamp, so we spent very little on food during those portions of our trip.
If you’re staying somewhere without meals included, keep in mind that grocery options inside Torres del Paine are extremely limited. In fact, this small minimarket near Hotel Lago Grey was the only true grocery-style shop we came across during our time in the park. It’s useful for picking up basic snacks, drinks, and supplies, but don’t expect the selection of a traditional grocery store.
For a proper grocery run, Puerto Natales is your best option. If you’re self-driving, you can also combine a trip into town for groceries with filling your car with gas.
There are several restaurants and cafés scattered throughout and around Torres del Paine. A few options to save are Restaurante Pehoé, Río Pingo, Restaurant Pehoé Barbecue, Restaurant Don Pascual, and Alveoli Serrano Restaurant. We stopped at Alveoli Serrano for lunch after our Cimarrón horseback ride, and the food was wonderful.
Activities
Activities can add several hundred dollars per person depending on how much you want to do. Some luxury and all-inclusive accommodation packages include guided excursions, so always check what’s already included before booking activities separately.
For reference, some of the experiences from our trip cost approximately:
- Grey Glacier boat excursion through Tierra Patagonia: $250 per person, including our guide, transportation, packed lunch, snacks, and drinks.
- Grey III boat excursion booked independently: roughly $120 per person, although prices vary by season.
- Cimarrón three-hour horseback ride: roughly $200 per person at the time of our trip.
- Mirador Base Torres: You can hike independently when regulations permit, or pay additional for a guided experience.
- Puma tracking: Prices vary considerably depending on whether you book a shorter wildlife excursion or a more specialized private experience. You can browse puma tracking and wildlife tours through GetYourGuide here, using a 5% discount code with “HEYMEAGAN5”.
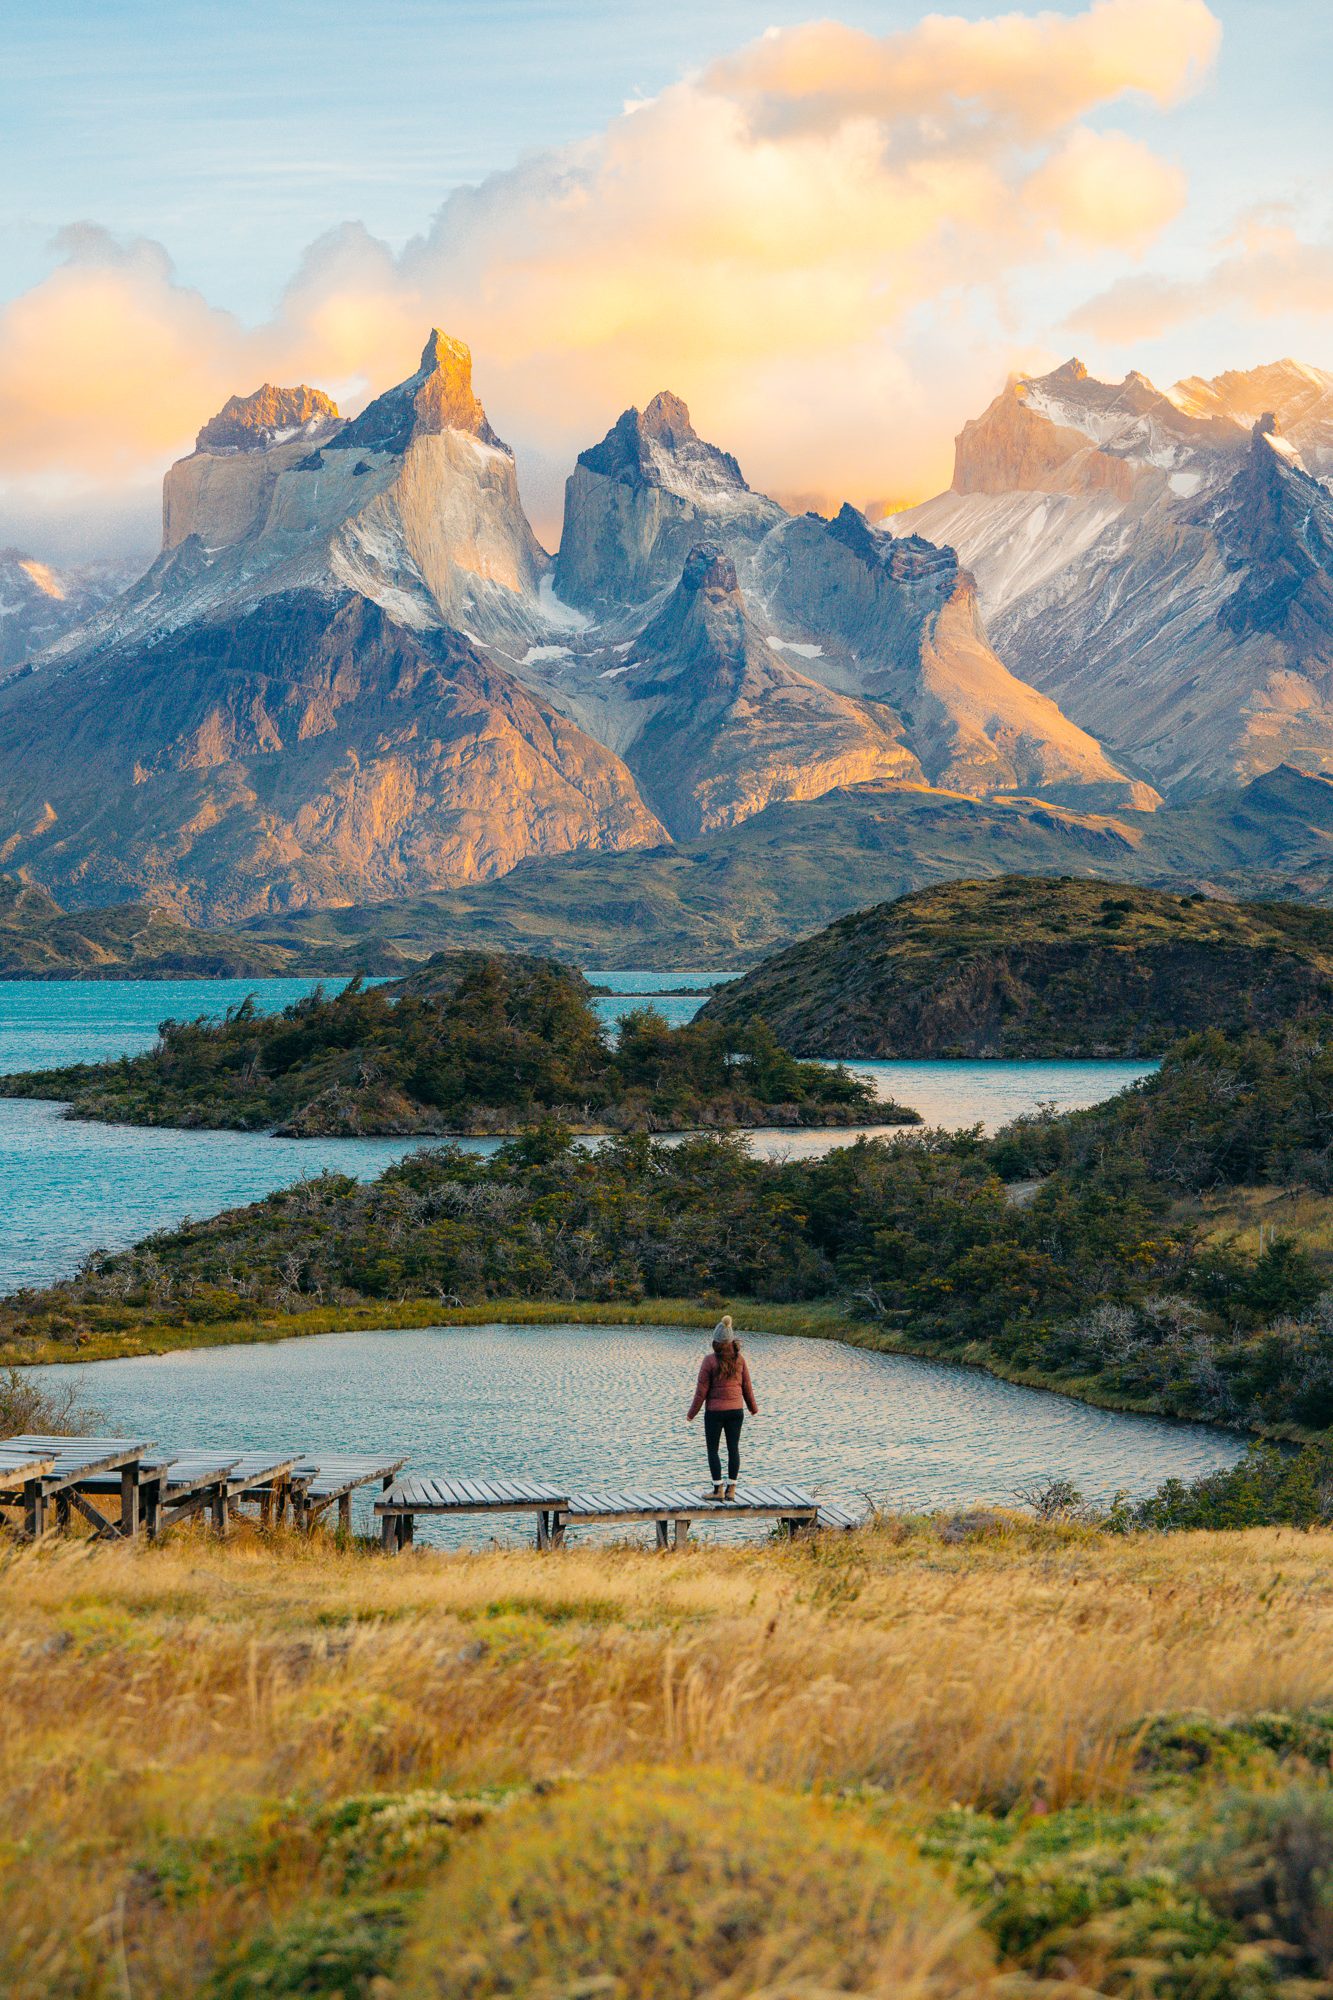
Estimated 9-Day Torres del Paine Budget
As a general starting point, I would plan for approximately:
- More Budget-Conscious: $1,500–$2,500 per person
- Mid-Range: $2,500–$4,500 per person
- Luxury: $5,000–$10,000+ per person
*These are planning estimates rather than fixed package prices and exclude international airfare. Your total can vary considerably depending on the season, whether you’re traveling solo or splitting hotel and rental-car costs, where you stay, and how many guided activities you book.
The biggest way to control your Patagonia budget is accommodation. You don’t need to stay at a luxury lodge every night to have an incredible trip. I loved mixing several very different stays together, allowing us to splurge on experiences and accommodations we really cared about while keeping other portions of the trip considerably more affordable.
Packing List for Torres del Paine
Packing for Torres del Paine is all about layers and preparing for rapidly changing weather. Even during our late-February trip, we experienced everything from warm sunshine to strong winds, rain, and cold mornings, sometimes within the same day.
You don’t need an enormous amount of gear, but there are a few things I would absolutely bring again.
Clothing & Layers
- Merino Wool Base Layer Top: This is the one I wore →
- Merino Wool Base Layer Bottoms: Shop mine →
- Patagonia Silent Down Jacket – Women’s: Shop at REI →
- Waterproof Rain Shell: This is the one I packed →
- Warm Gloves: Especially useful for cold mornings, sunrise photography, and windy viewpoints.
- The North Face Beanie: Shop mine →
- Smartwool Hiking Socks: Shop mine → — bring multiple pairs, especially if you’re planning longer hikes.
Shoes
- KEEN Hiking Boots: These are my go-to hiking boots → — I wore these for Mirador Base Torres and would absolutely recommend proper hiking boots for longer trails.
- Blundstone Chelsea Boots: Shop mine → — I wore these constantly for driving days, photography stops, horseback riding, and easier exploring around the park. I love having no laces and a boot that is still capable of hiking distances if needed.
Daypack & Hiking Gear
- The North Face Basin 15L Backpack: Shop it here →
- Trekking Poles: Shop the ones I recommend → — especially helpful for Mirador Base Torres.
- Reusable Water Bottle: Shop mine →
- Sunski Polarized Sunglasses: Shop here → — I’ve been obsessed with Sunski lately. They’re reasonably priced for a great pair of polarized sunglasses.
- Small First-Aid Kit: Shop here →
Electronics & Photography Gear
If you’re coming to Patagonia for photography, bring more batteries and memory than you think you’ll need. Long days exploring the park, cold mornings, wildlife encounters, and constantly changing light meant my camera was rarely put away.
- Canon RF24-105mm F2.8 L IS USM Z: Shop here → — this was the versatile zoom lens I relied on heavily throughout our trip.
- Canon RF100-500mm F4.5-7.1 L IS USM: Shop here → — one of my most important lenses for wildlife and compressed landscape photography.
- Tripod: Shop mine → — especially useful for sunrise, sunset, and low-light landscapes.
- Extra Camera Batteries: Cold temperatures and long days away from outlets can drain batteries quickly.
- Extra Memory Cards: Shop mine →
- Portable Power Bank: Shop mine → — a fast portable charger that can charge wirelessly with MagSafe or through a cable.
- International Travel Adapter: Shop my go-to adapter → — I love traveling with one versatile adapter that works across multiple countries rather than carrying several separate plugs.
- Garmin inReach: Shop here → — useful for additional communication capability when exploring remote areas without cell service.
A Few Other Things Worth Packing
- Windproof layers: Patagonia’s wind is no joke. Your waterproof shell can often double as your outer wind layer.
- Small snacks: Especially important for long hiking and photography days.
- Offline maps: Download the Torres del Paine area in Google Maps before entering the park.
- Offline travel documents: Download or screenshot your park tickets, hotel reservations, rental-car documents, and other important information before arriving.
- Binoculars: Worth bringing if wildlife is a major priority.
Coming soon: I’m putting together a complete Patagonia packing guide with everything I brought, what I actually used, and what I’d leave at home next time.
Photography Tips for Torres del Paine
Torres del Paine is one of those places where it’s almost impossible to put your camera away. The mountains look completely different as the light changes, wildlife can appear when you least expect it, and some of our favorite photographs came from abandoning the plan entirely.
Having our own rental car was one of the best things we did for photography because it gave us the freedom to chase light, stop for wildlife, and change locations at the last minute.
Sunrise & Sunset
Sunrise was my favorite time to photograph Torres del Paine. The park was quiet, wildlife was more active, and the first light hitting the Paine Massif could be incredible.
One morning, we left Tierra Patagonia before sunrise intending to look for wildlife. When we realized the sky was completely clear, we changed plans and drove roughly an hour to the Explora Boardwalk at Lake Pehoé, arriving just in time for one of the best sunrises of our entire trip.
My advice: give yourself flexibility and follow the light. Patagonia’s weather changes constantly, and sometimes the best photography happens when you throw out the original plan.
The same goes for sunset. Don’t pack up the second the sun disappears. Some of our best color happened immediately before or after sunset.
The Lenses I Used Most
If I could only bring two lenses back to Patagonia, these would be them:
- Canon RF24-105mm F2.8 L IS USM Z — my most-used lens for landscapes, horseback riding, people, and everyday photography throughout the trip.
- Canon RF100-500mm F4.5-7.1 L IS USM — essential for wildlife and one of my favorite lenses for compressing distant mountains into the landscape.
The 100-500mm was especially valuable because wildlife encounters happened unexpectedly. We photographed guanacos, foxes, birds of prey, and eventually a wild puma, so I kept my telephoto somewhere I could grab it quickly rather than buried in my luggage.
Be Ready for Patagonia’s Wind
The wind here can be intense. If you’re using a tripod, keep it low and stable and avoid extending the center column when conditions are particularly windy. For handheld photography, I often prioritize a faster shutter speed rather than risking motion blur.
Can You Fly a Drone in Torres del Paine?
Do not plan on flying a drone inside Torres del Paine National Park. Drone use is heavily restricted in Chilean protected areas and should never be assumed to be permitted.
Regulations and permitting can change, so always check the current CONAF and Chilean aviation regulations before traveling.
More than anything, don’t get so focused on the famous viewpoints that you overlook everything between them. Some of my favorite Patagonia images came from pulling over unexpectedly, watching wildlife from the side of the road, riding through the mountains, or changing our entire morning because the light looked better somewhere else.
FAQ: Torres del Paine National Park
How Many Days Do You Need in Torres del Paine?
I recommend at least 4–5 days, but if you want time for hiking, wildlife, photography, and a few slower days without feeling rushed, 7–9 days is ideal. We spent 8 nights and 9 days in the park and never felt like we were running out of things to do.
Do You Need a Rental Car in Torres del Paine?
No, but I would absolutely rent one again. You can get around using hotel transfers, buses, private drivers, and organized tours, but having our own car gave us significantly more freedom to chase sunrise, look for wildlife, move between hotels, and change plans around the weather.
Can Beginners Visit Patagonia?
Absolutely. You don’t need to be an experienced backpacker or mountaineer to visit Torres del Paine. There are scenic drives, short walks, boat excursions, horseback rides, wildlife experiences, and incredible hotels that make the park accessible even if hiking isn’t the focus of your trip.
How Difficult Is the Mirador Base Torres Hike?
It’s challenging, but very doable for reasonably fit hikers who are prepared for a long day. The hike is approximately 13 miles round trip with around 3,500 feet of elevation gain, and the final rocky climb is the most demanding section. I consider myself a hiker and still found it challenging. Give yourself plenty of time, start early, bring layers, and don’t underestimate it.
Can You Visit Torres del Paine Without Hiking?
Yes, and I think this is one of the biggest misconceptions about Patagonia. Some of our favorite experiences didn’t involve major hikes at all. You can drive between viewpoints, photograph wildlife, take the Grey Glacier boat, go horseback riding, visit Lake Pehoé, and simply enjoy the landscapes from your hotel.
Can You See Pumas in Torres del Paine?
Yes. Torres del Paine is an incredible destination for seeing wild pumas, although a sighting is never guaranteed. We were incredibly lucky to spot one while exploring independently. If seeing a puma is a major priority, I would book a dedicated puma-tracking experience with an experienced local guide to improve your chances.
How Expensive Is Torres del Paine?
It can be expensive, but there’s a huge difference between visiting on a more independent budget and staying exclusively at luxury all-inclusive lodges. For a 9-day trip, I would roughly budget $1,500–$2,500 per person on the more budget-conscious end, $2,500–$4,500 mid-range, and $5,000–$10,000+ for a luxury trip, excluding international airfare.
Is Torres del Paine Safe?
We felt very comfortable traveling independently throughout Torres del Paine. For us, the bigger considerations weren’t crime but remote roads, rapidly changing weather, strong wind, limited cell service, and the distances between services. Download offline maps, keep enough fuel in your car, carry layers, and make sure someone knows your plans when heading out on longer hikes.
What Is the Best Time to Visit Torres del Paine?
December through March is the most popular time to visit for longer daylight hours and generally better conditions for hiking and exploring. We visited in late February, toward the end of Patagonia’s summer, and I would happily choose that time of year again. Even in summer, though, prepare for cold, rain, sunshine, and serious wind—sometimes all in one day.
What I’d Do Differently
If I planned this exact trip again tomorrow, there honestly isn’t much I would completely change. Nine days gave us enough time to experience Torres del Paine without feeling like we were racing from one attraction to the next, and mixing luxury stays with more affordable accommodations gave us several completely different ways to experience the park.
But there are a few things I’d adjust the second time around:
- I’d still rent a car. No question. The freedom it gave us for photography, wildlife, changing weather, and moving between hotels was one of the best decisions we made.
- I’d book everything earlier. Six months was enough to make the trip happen, but I’d start 9–12 months out next time for better hotel, rental car, and room availability.
- I’d stay at Tierra Patagonia again. Four nights felt like enough time to settle in and actually enjoy the property, and it was easily my favorite hotel of the trip.
- I’d leave even more time for wildlife. Some of my favorite moments happened when we weren’t really doing anything except driving slowly, watching the landscape, and waiting to see what appeared.
- I’d schedule Base Torres earlier in the trip. Weather changes so quickly here that having a few backup days gives you more flexibility if conditions aren’t ideal on your planned hiking day.
- I’d build in one completely unscheduled day. One of the best things about Patagonia is that the weather often decides what you’re doing anyway. Having a day with nowhere you have to be gives you room to chase good light, revisit a favorite place, look for wildlife, or simply slow down.
- I’d horseback ride again—and probably go longer. Our three-hour ride with Cimarrón was one of my favorite experiences, and next time I’d seriously consider one of their multi-day horseback trips.
- I’d still split the trip between different parts of the park. Rather than choosing one hotel for the entire stay, moving between Tierra Patagonia, EcoCamp, and Hostería Pehoé gave us easier access to different landscapes and experiences.
More than anything, I’d resist the urge to plan every hour of the trip. Torres del Paine is a place where the weather changes, wildlife appears unexpectedly, and sometimes a clear sky at 5 a.m. is reason enough to abandon the plan and drive an hour in the opposite direction.
Those spontaneous moments ended up being some of my favorites.
Continue Planning Your Patagonia Trip
This 9-day itinerary is just the beginning. I’m working on several more in-depth Patagonia guides covering the hotels, hikes, wildlife experiences, photography, and practical planning that deserve more detail than I could fit into this article.
Related Patagonia Articles
Coming Soon:
- Complete Tierra Patagonia Review
- Complete EcoCamp Patagonia Review
- The Ultimate Patagonia Packing List
- Is Puma Tracking in Torres del Paine Worth It?
- Patagonia Photography Guide
- Best Hotels in Torres del Paine
- Renting a Car in Patagonia: Everything You Need to Know
I’ll continue updating this page with links as each guide goes live, so you can use this itinerary as the starting point for planning your own trip.
And if you’re currently staring at a dozen open tabs wondering how you’re ever going to piece a Patagonia trip together, I hope this guide made it feel a little more possible. It took me more than a decade of dreaming about Patagonia to finally get here, and somehow, it was even better than I imagined..

Hi, this is a comment.
To get started with moderating, editing, and deleting comments, please visit the Comments screen in the dashboard.
Commenter avatars come from Gravatar.